
Protect a server with Imunify360
Turn on Imunify360 for a server: its firewall, web application firewall and bot protection guard every site, malware scanning cleans what it finds, with Undo, and its WordPress plugin guards sites from inside.
9 min read Updated
Imunify360 protects a whole server. Its firewall blocks addresses known for attacks, its web application firewall stops attacks on WordPress, bot protection checks suspicious visitors in the browser, and real-time malware scanning cleans what it finds, keeping a copy of each file so you can undo it. Its WordPress plugin can guard each site from inside WordPress too. It comes with the servers Rabbitflare creates for you, and it's on from the start on new ones.
 Imunify360 firewall, WAF, bot and DoS protection
Which servers have it
Servers Rabbitflare creates for you with Intel or AMD processors and 2 GB of memory or more. It isn't available on Arm sizes, on Amazon EC2, on smaller sizes, during the free trial, or on servers you connect with Bring your own server. Their sites keep the standard web application firewall.
Turn it on
New servers have it from the start. For a server you already have:
-
Open the server's Imunify360 page
In Servers, open the server and choose Imunify360 in its menu.
-
Turn it on
Choose Turn on Imunify360. Setting it up takes about 5 to 10 minutes, and your sites stay online meanwhile; you can leave the page. The oldest site on the server gets malware scanning, included.
-
Choose the sites for malware scanning
The firewall, web application firewall and bot protection guard every site straight away. Malware scanning runs on the sites you turn it on for: see Malware scanning below.
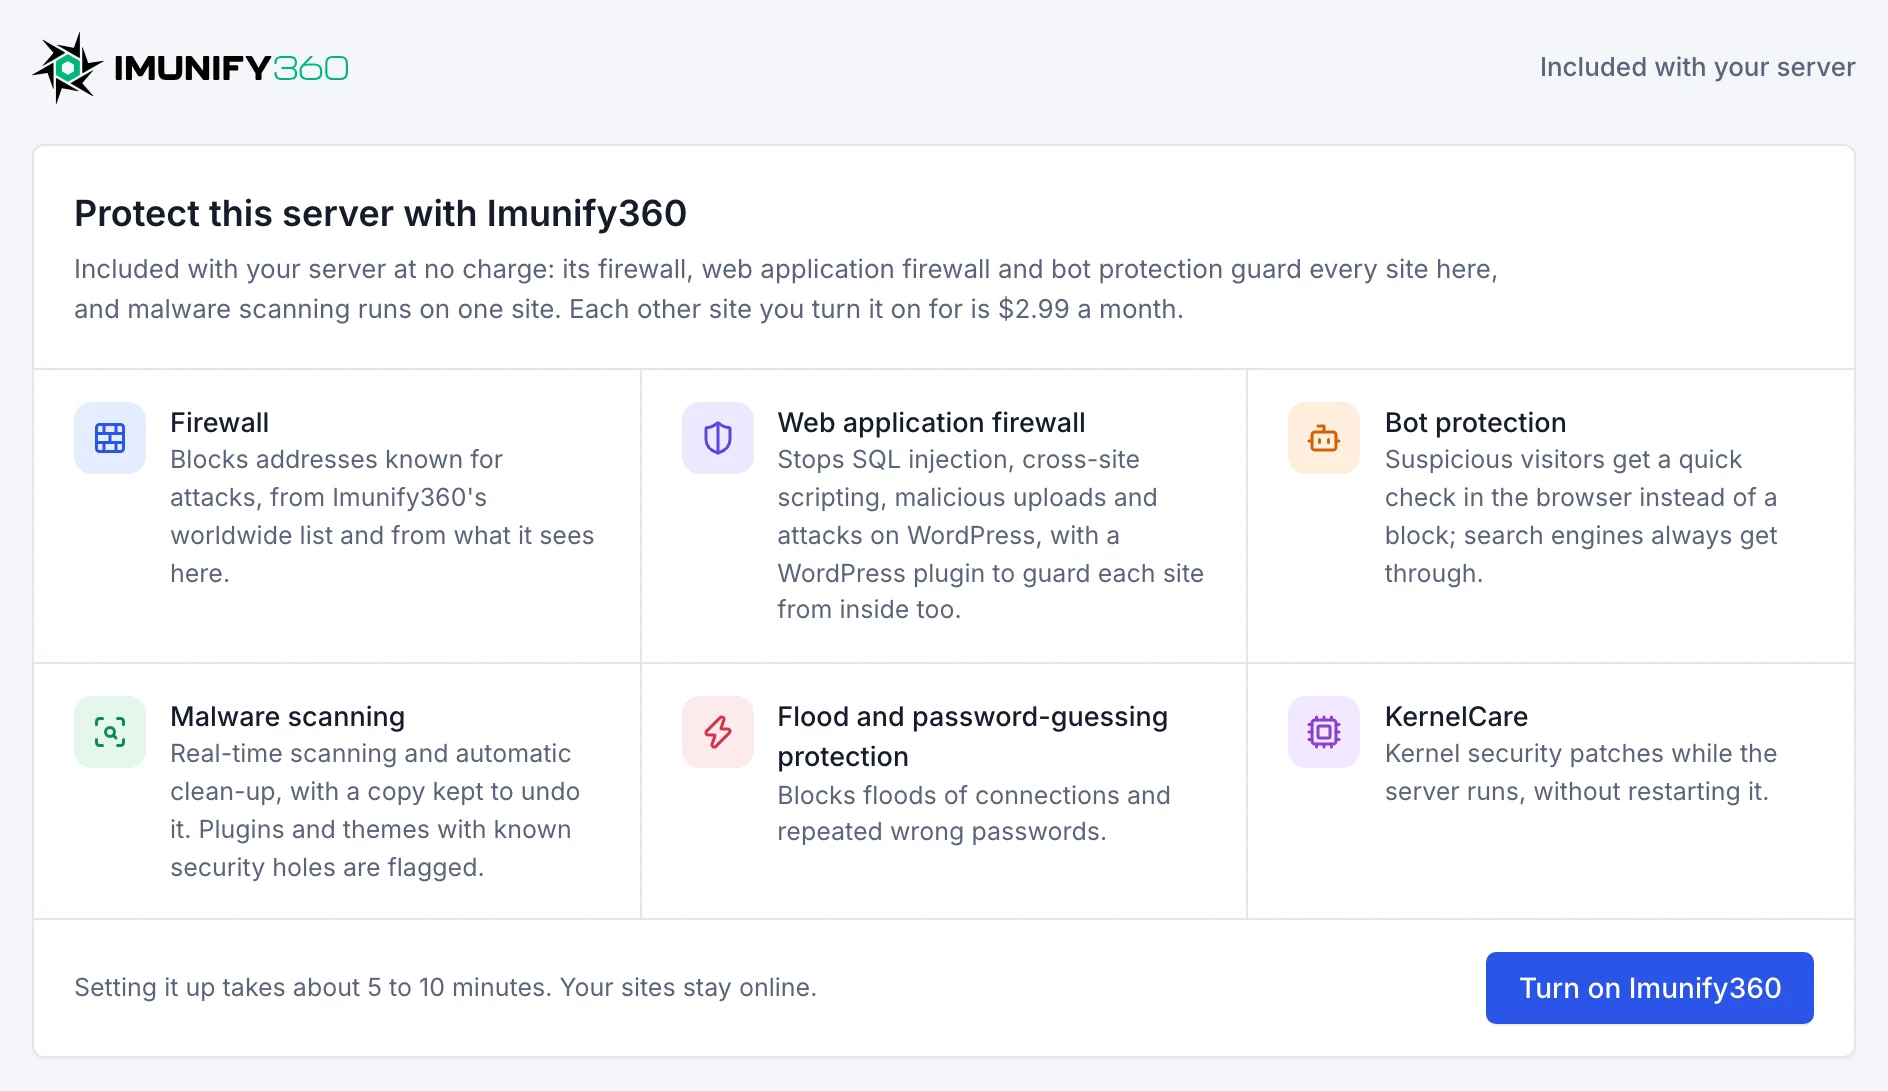
The Imunify360 page
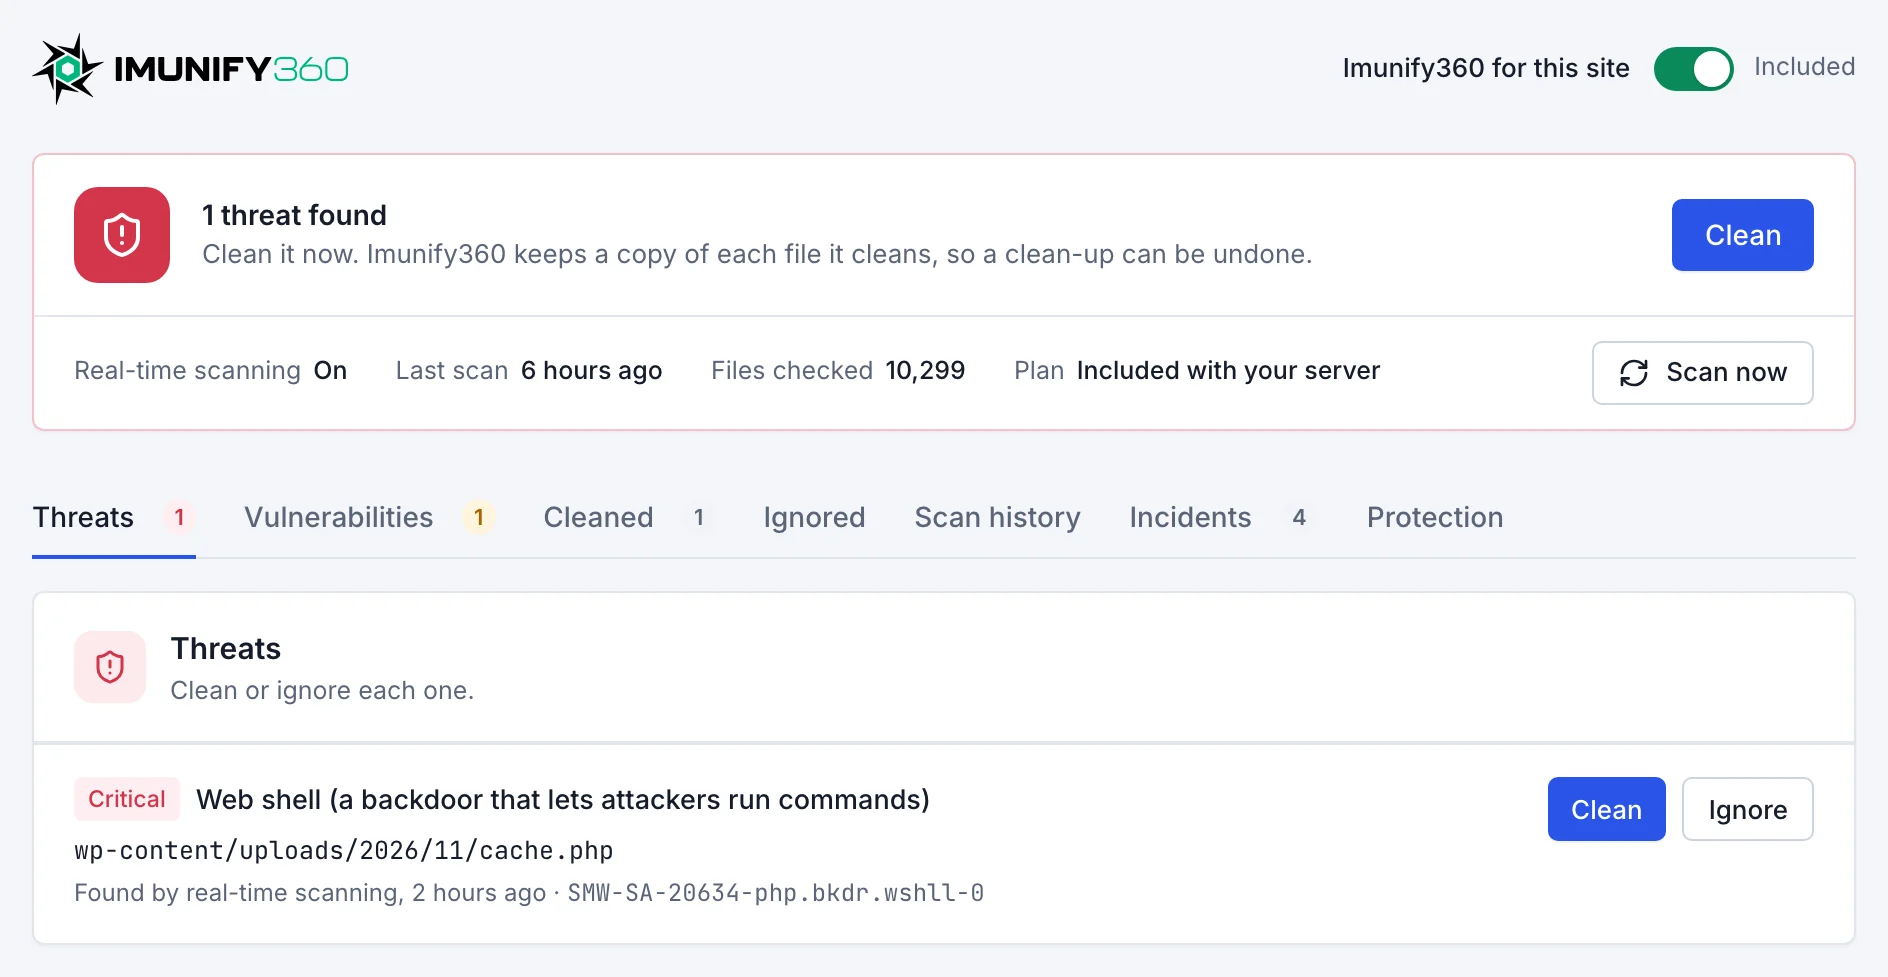
Each server's Imunify360 page opens on its Overview: how things stand, the attacks stopped in the last 24 hours, threats to clean, each protection with its switch, the sites and the latest incidents. The other tabs:
- Malware
- Threats still open, plugins and themes with known security holes, what was cleaned (each with Undo), and how scanning runs.
- Firewall
- The always-allowed, blocked and CAPTCHA lists, blocked ports, DoS protection and password guessing.
- Web protection
- The web application firewall's rule set, WordPress login protection, rules turned off for a site, the WordPress plugin, and bot protection with the search engines it always lets through.
- Incidents
- Every attack it stopped or noticed, with where it came from and why.
- Settings
- KernelCare, blacklist monitoring, email alerts, and turning Imunify360 off.
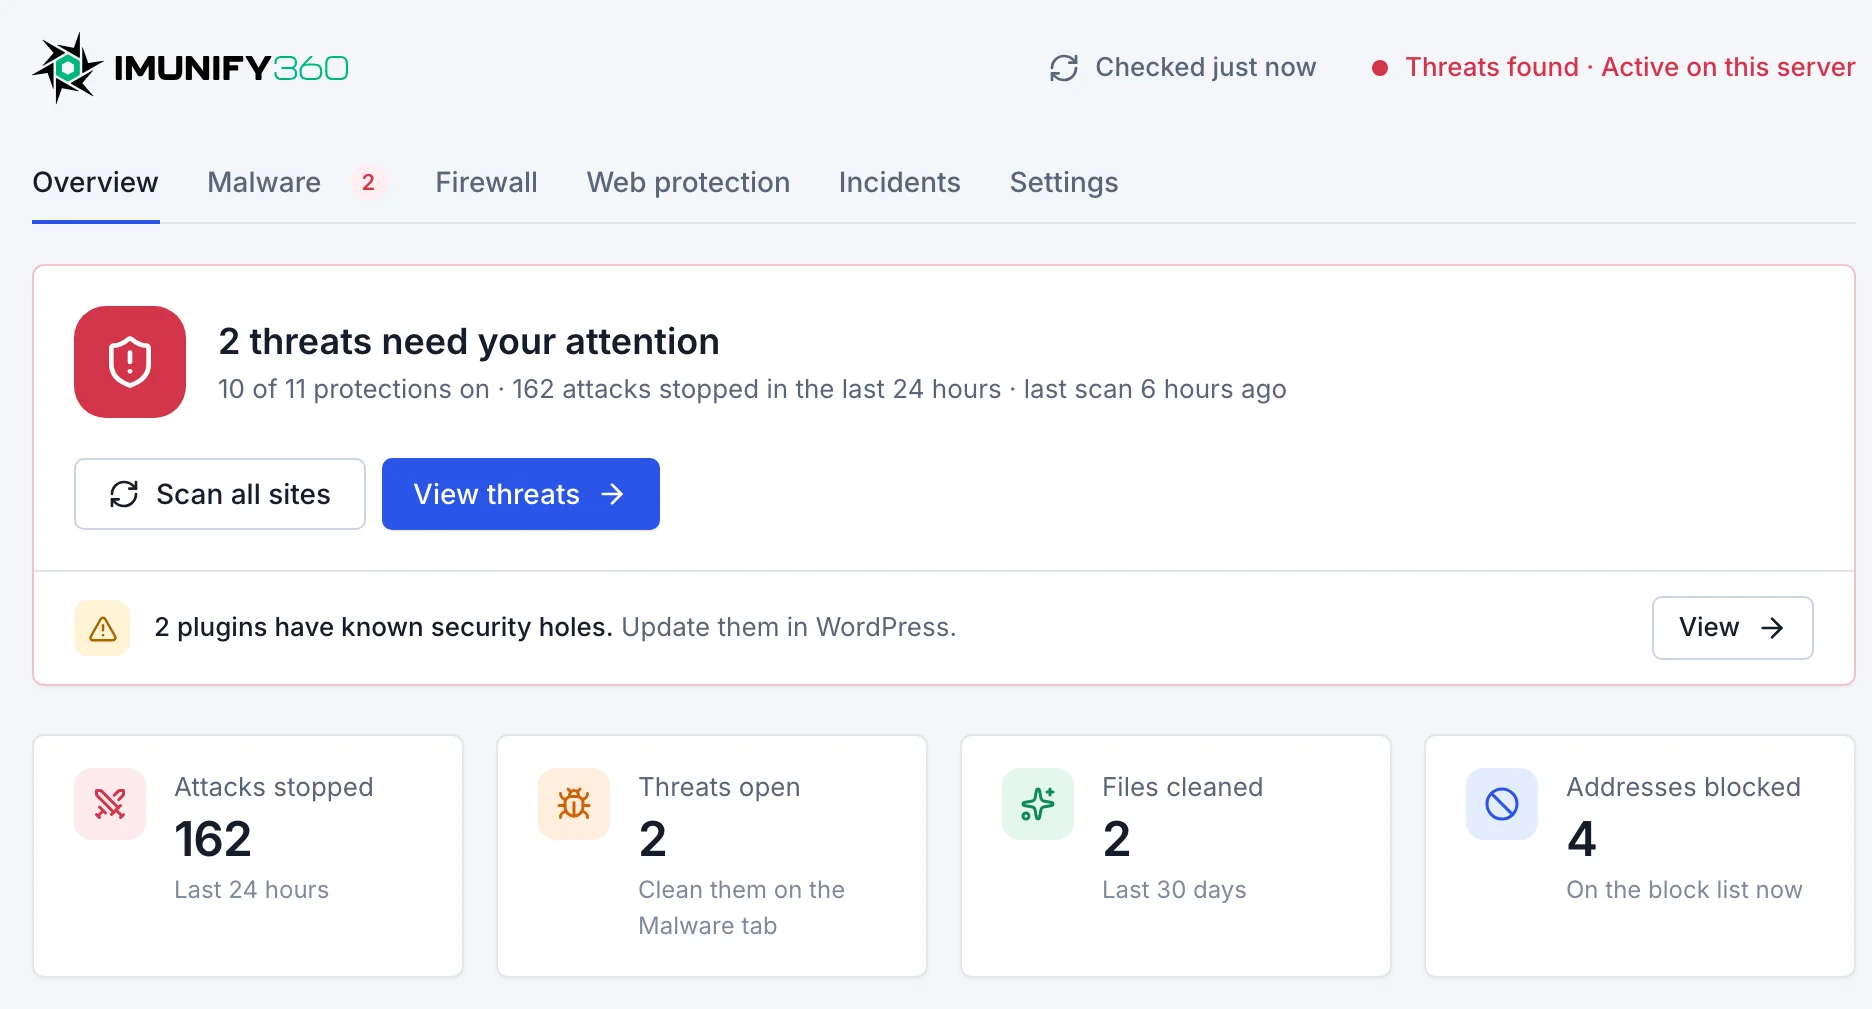
What protects your sites
- Firewall
- Blocks addresses known for attacks, from Imunify360's worldwide list and from what it sees on your server. Add your own addresses, ranges and countries to the lists.
- Web application firewall
- Stops SQL injection, cross-site scripting, malicious uploads and attacks on known holes in WordPress, its plugins and themes. It takes the place of the OWASP rules on this server.
- Bot protection
- Visitors that look like bots get a quick check in the browser instead of a block. It sees visitors' real addresses behind Cloudflare and other CDNs, and always lets search engines through: see Search engines.
- DoS and password guessing
- Blocks an address that opens too many connections at once, or keeps getting SSH passwords wrong. WordPress login protection, on the Web protection tab, does the same for your sites' logins.
- KernelCare
- Applies the Linux kernel's security patches while the server runs, without a restart.
- Blacklist monitoring
- Checks every day whether one of your domains is on a blacklist, and emails you if one is.
- WordPress plugin
- When you turn it on, it guards each site with malware scanning from inside WordPress: a firewall for known holes in the site's plugins and themes, and AI bot protection. See The WordPress plugin.
Malware scanning
Malware scanning runs on the sites you turn it on for: every new or changed file is checked straight away, the whole site is scanned every day with its database, and what's found is cleaned. One site per server is included; each other site is $2.99 a month. Turn it on or off for a site with its switch in the server's Sites list, or on the site's own Imunify360 tab. Up to 30 sites on a server can have it.
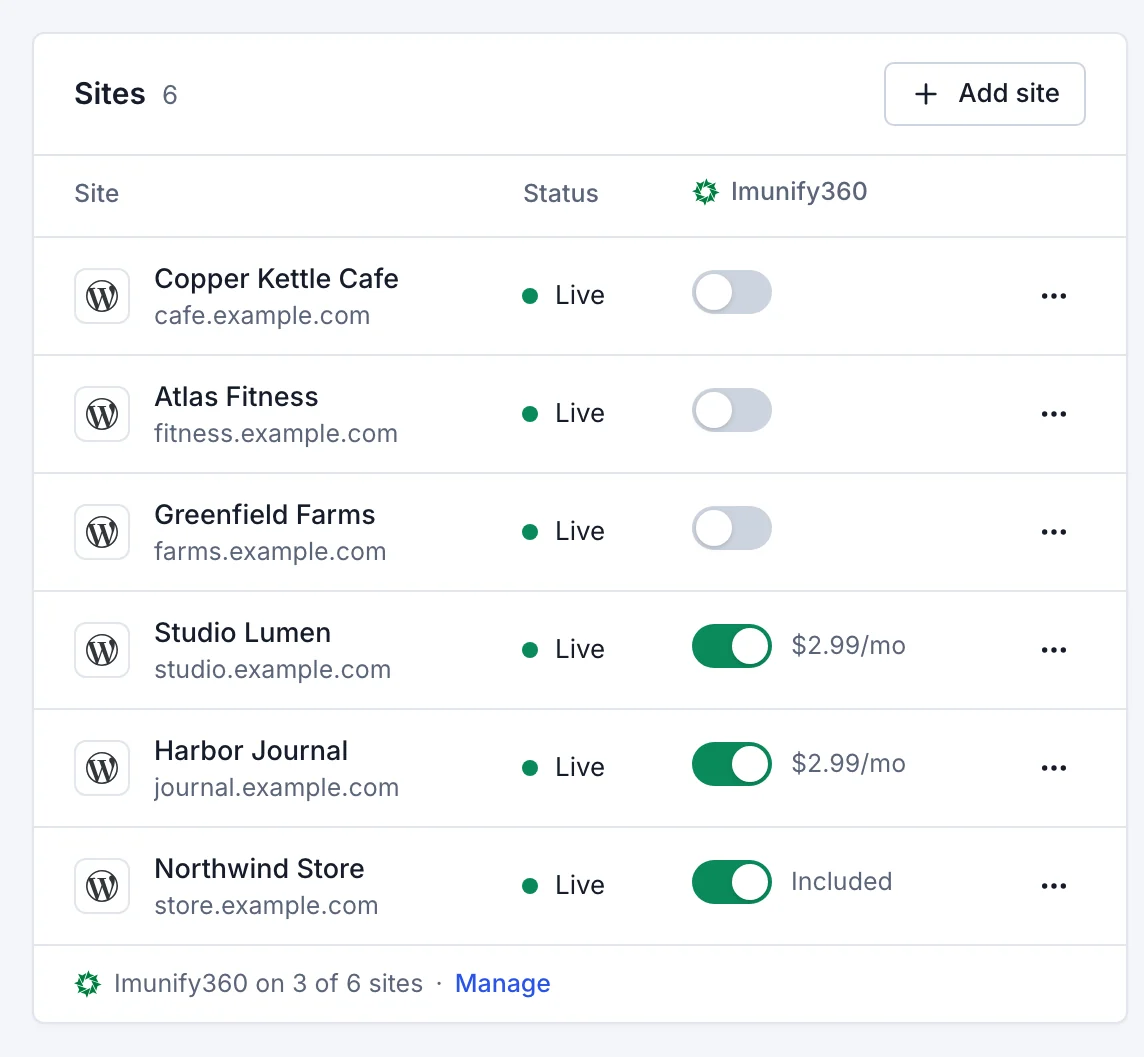
A site past the included one needs a saved card. Staging copies are never part of it.
When malware is found
Imunify360 cleans it straight away: the malicious code is removed, the rest of the file is kept, and so is a copy of the file as it was, for 14 days unless you change it. You get an email. The Malware tab lists what was cleaned, each with Undo, and anything still open, with Clean and Ignore.
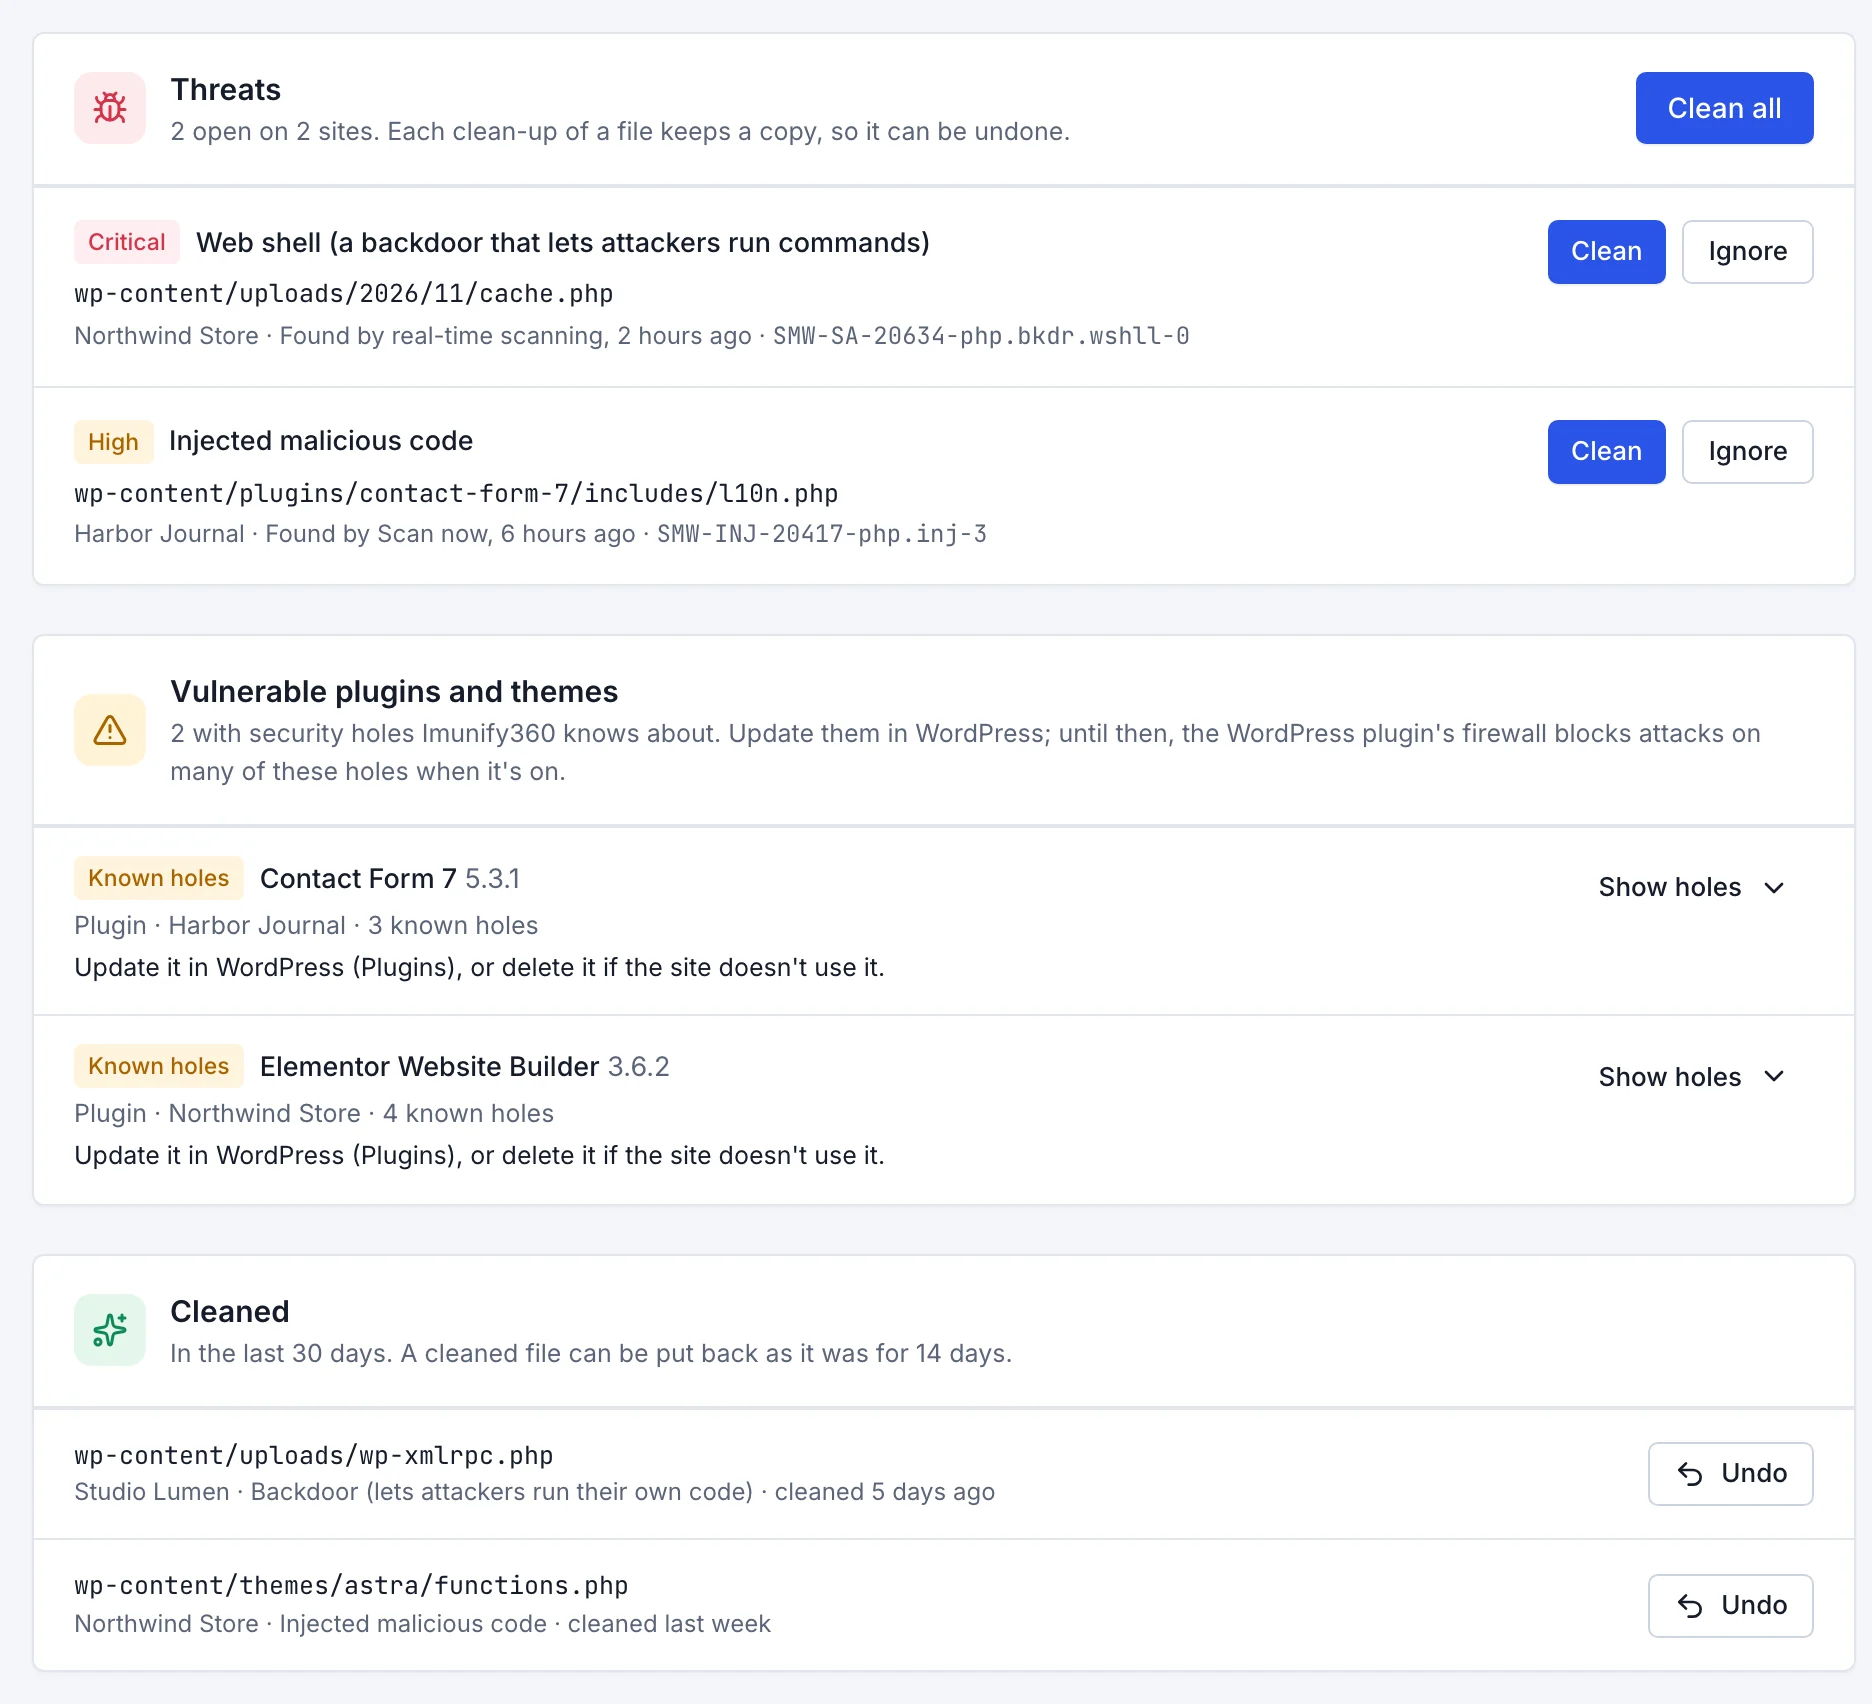
Rather decide yourself? On the Malware tab, set When malware is found to Only alert me: nothing changes until you choose Clean. To check a site now, choose Scan all sites, or Scan now on the site's tab.
Vulnerable plugins and themes
As it scans, Imunify360 also finds plugins, themes and WordPress installs with security holes it knows about. The Malware tab lists them for every site with malware scanning, and each site's tab has its own Vulnerabilities list: the name and the version installed, how many holes, and each hole with its CVE. The Overview says when there are any, and you get an email when new ones are found, once for each.
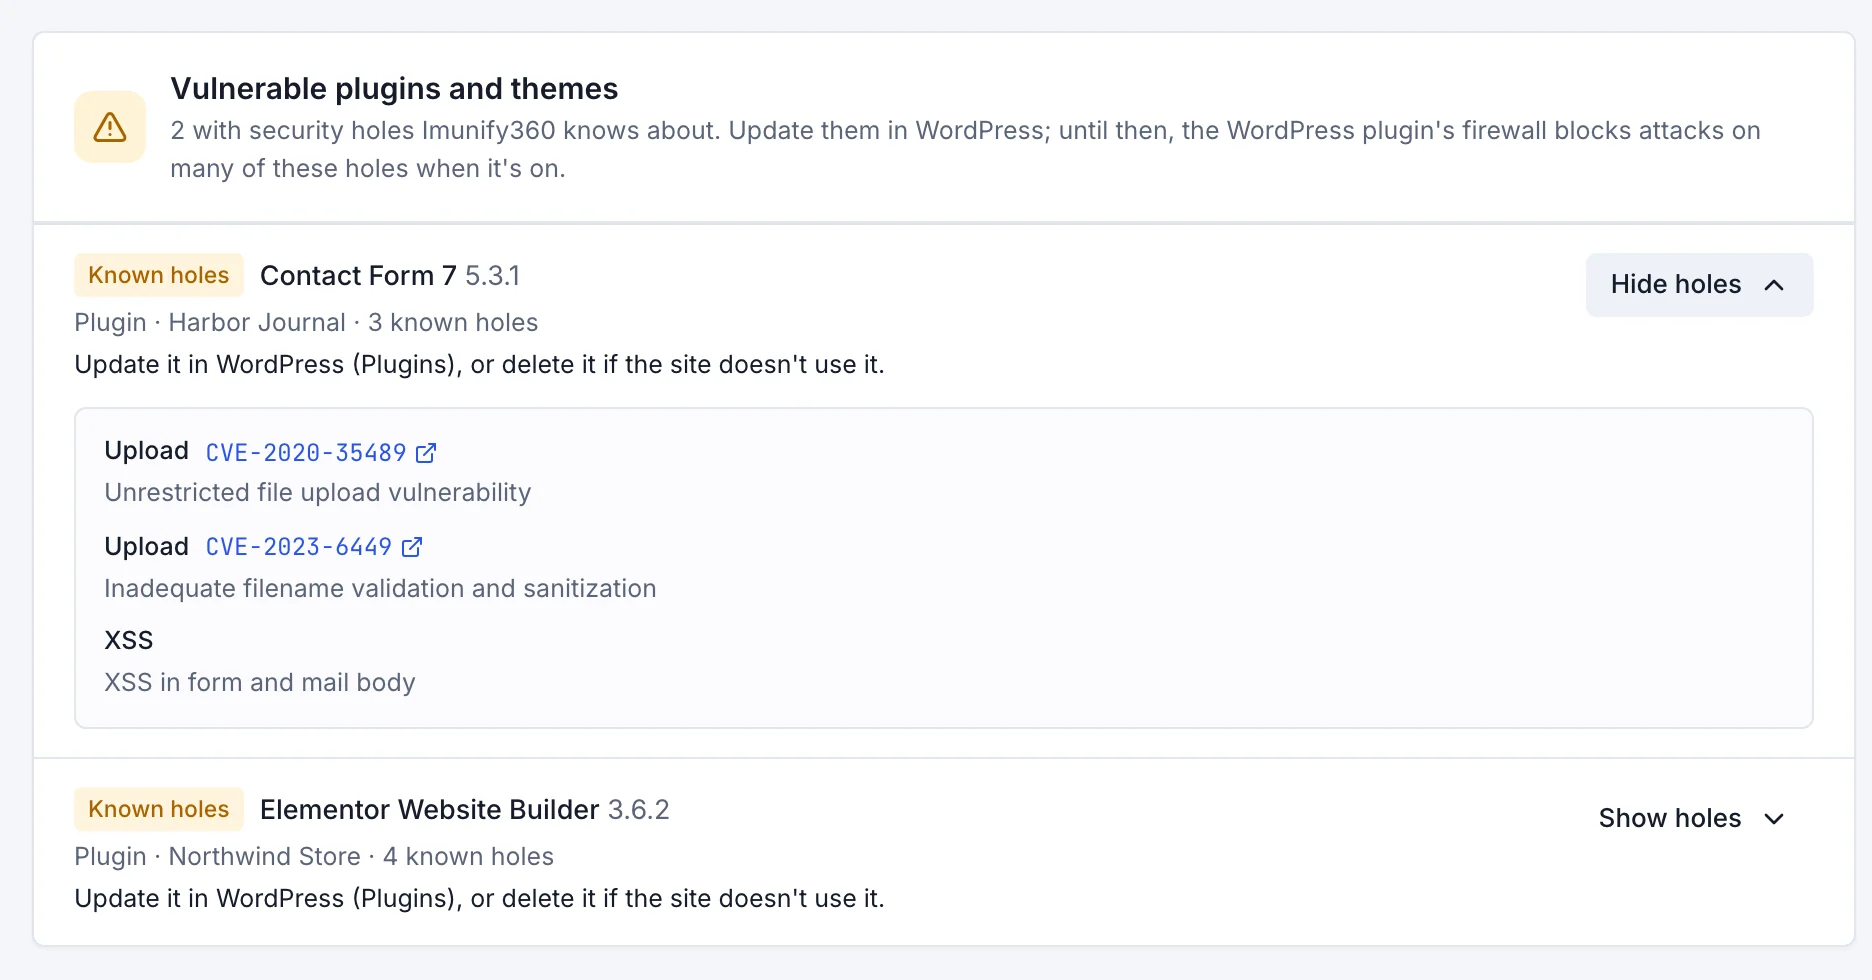
To close the holes, update the plugin or theme in WordPress (or WordPress itself), or delete it if the site doesn't use it. Until then, the WordPress plugin's firewall blocks attacks on many of these holes, when it's on.
The WordPress plugin
Imunify360's own WordPress plugin, Imunify Security, guards a site from inside WordPress. Its firewall blocks requests that attack known holes in the site's plugins, themes and WordPress, and its AI bot protection limits how fast AI crawlers, scrapers and other bots can load pages. The site's Imunify360 status also shows in its WordPress dashboard. It's included, and it's off until you turn it on.
-
Turn it on for the server
On the server's Imunify360 page, open Web protection and turn on WordPress plugin. It's added to each site with malware scanning, one after another, in about a minute a site, and to each site you turn malware scanning on for later.
-
Set it up site by site
Each site has its WordPress firewall switch, on from the start, and its AI bots setting: Off, Balanced (limits how fast bots load pages and blocks harmful ones), Strict (a bot that goes over the limits is blocked sooner) or Monitor only (bot traffic is only recorded). The same settings are on the site's own Imunify360 tab, under Protection.
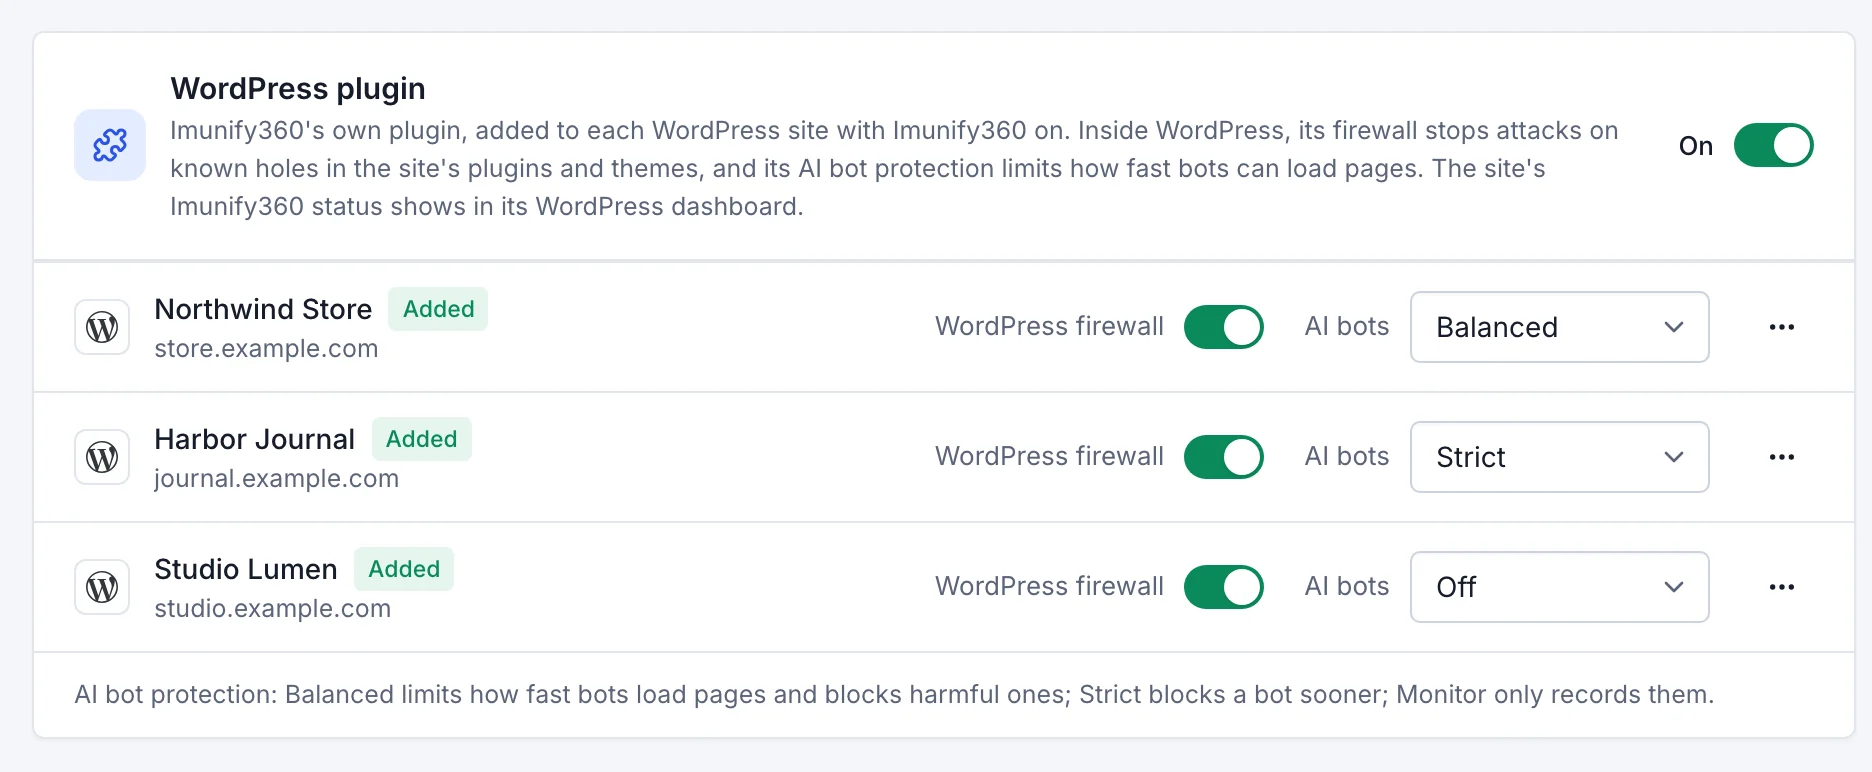
The plugin keeps itself up to date. To take it off one site, use the site's menu on the Web protection tab (or Take it off on the site's tab) rather than WordPress's Plugins page; it stays off that site until you add it again. Turning the plugin off for the server takes it off every site, with its data. A site whose malware scanning is turned off loses the plugin too.
Search engines
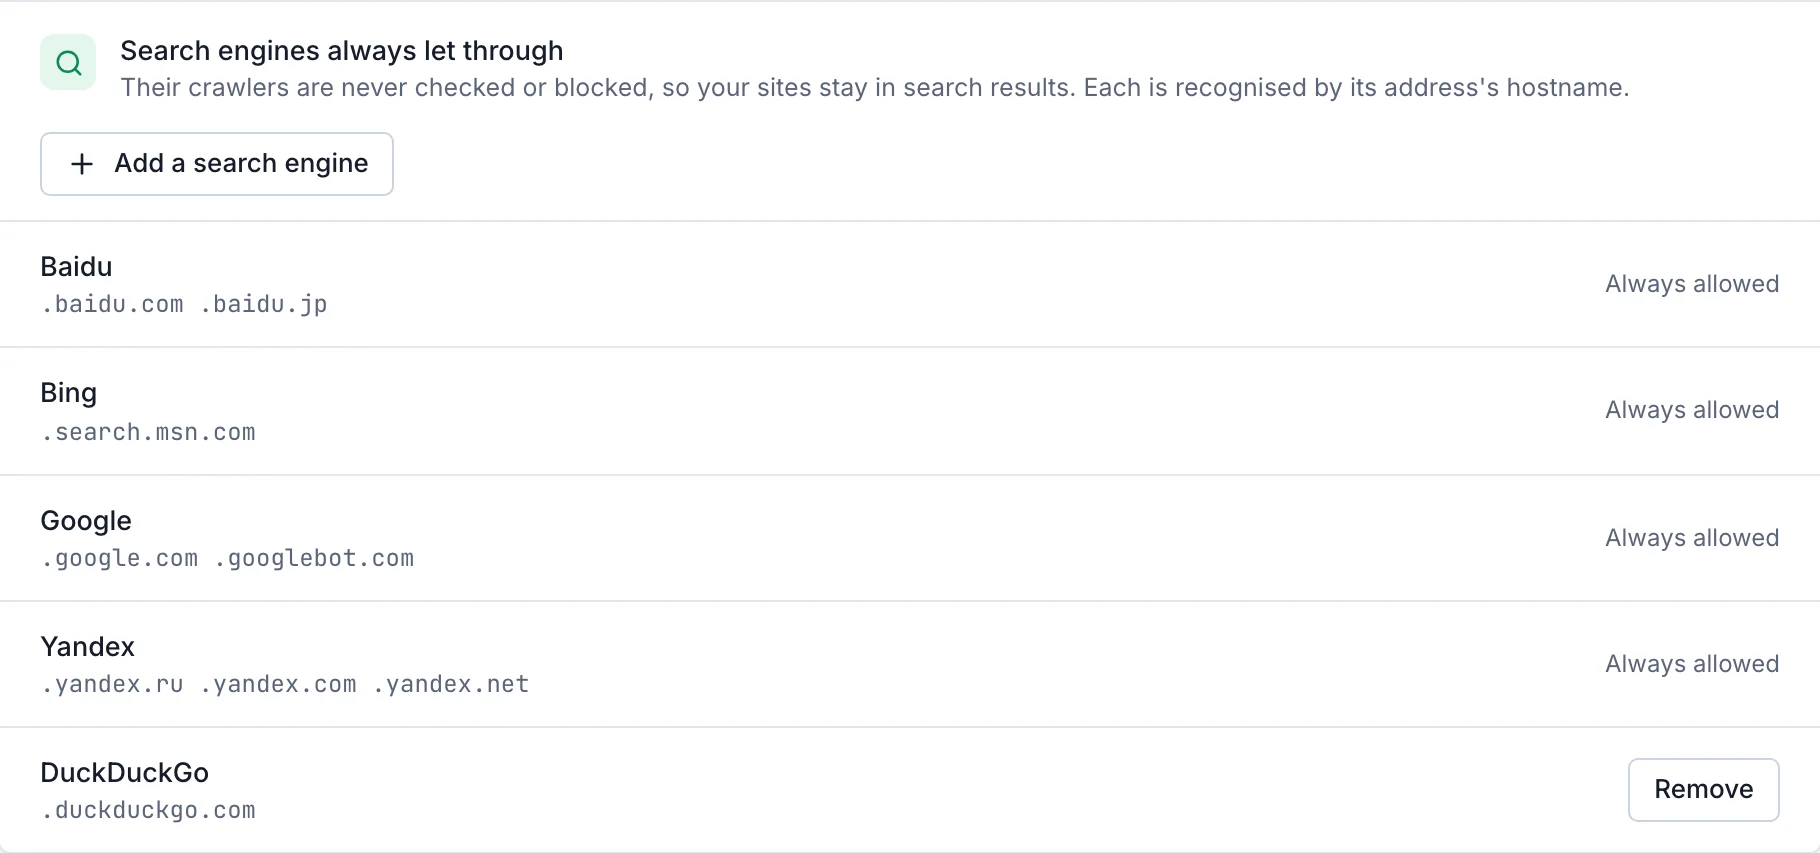
Bot protection never checks or blocks Google, Bing, Yandex and Baidu, so your sites stay in their search results. Their crawlers are recognised by
their addresses' hostnames. To add another search engine, open Web protection, choose Add a search engine, and give its name and
the domains its crawlers' hostnames end with, as the search engine publishes them (for DuckDuckGo, .duckduckgo.com).
Incidents and false alarms
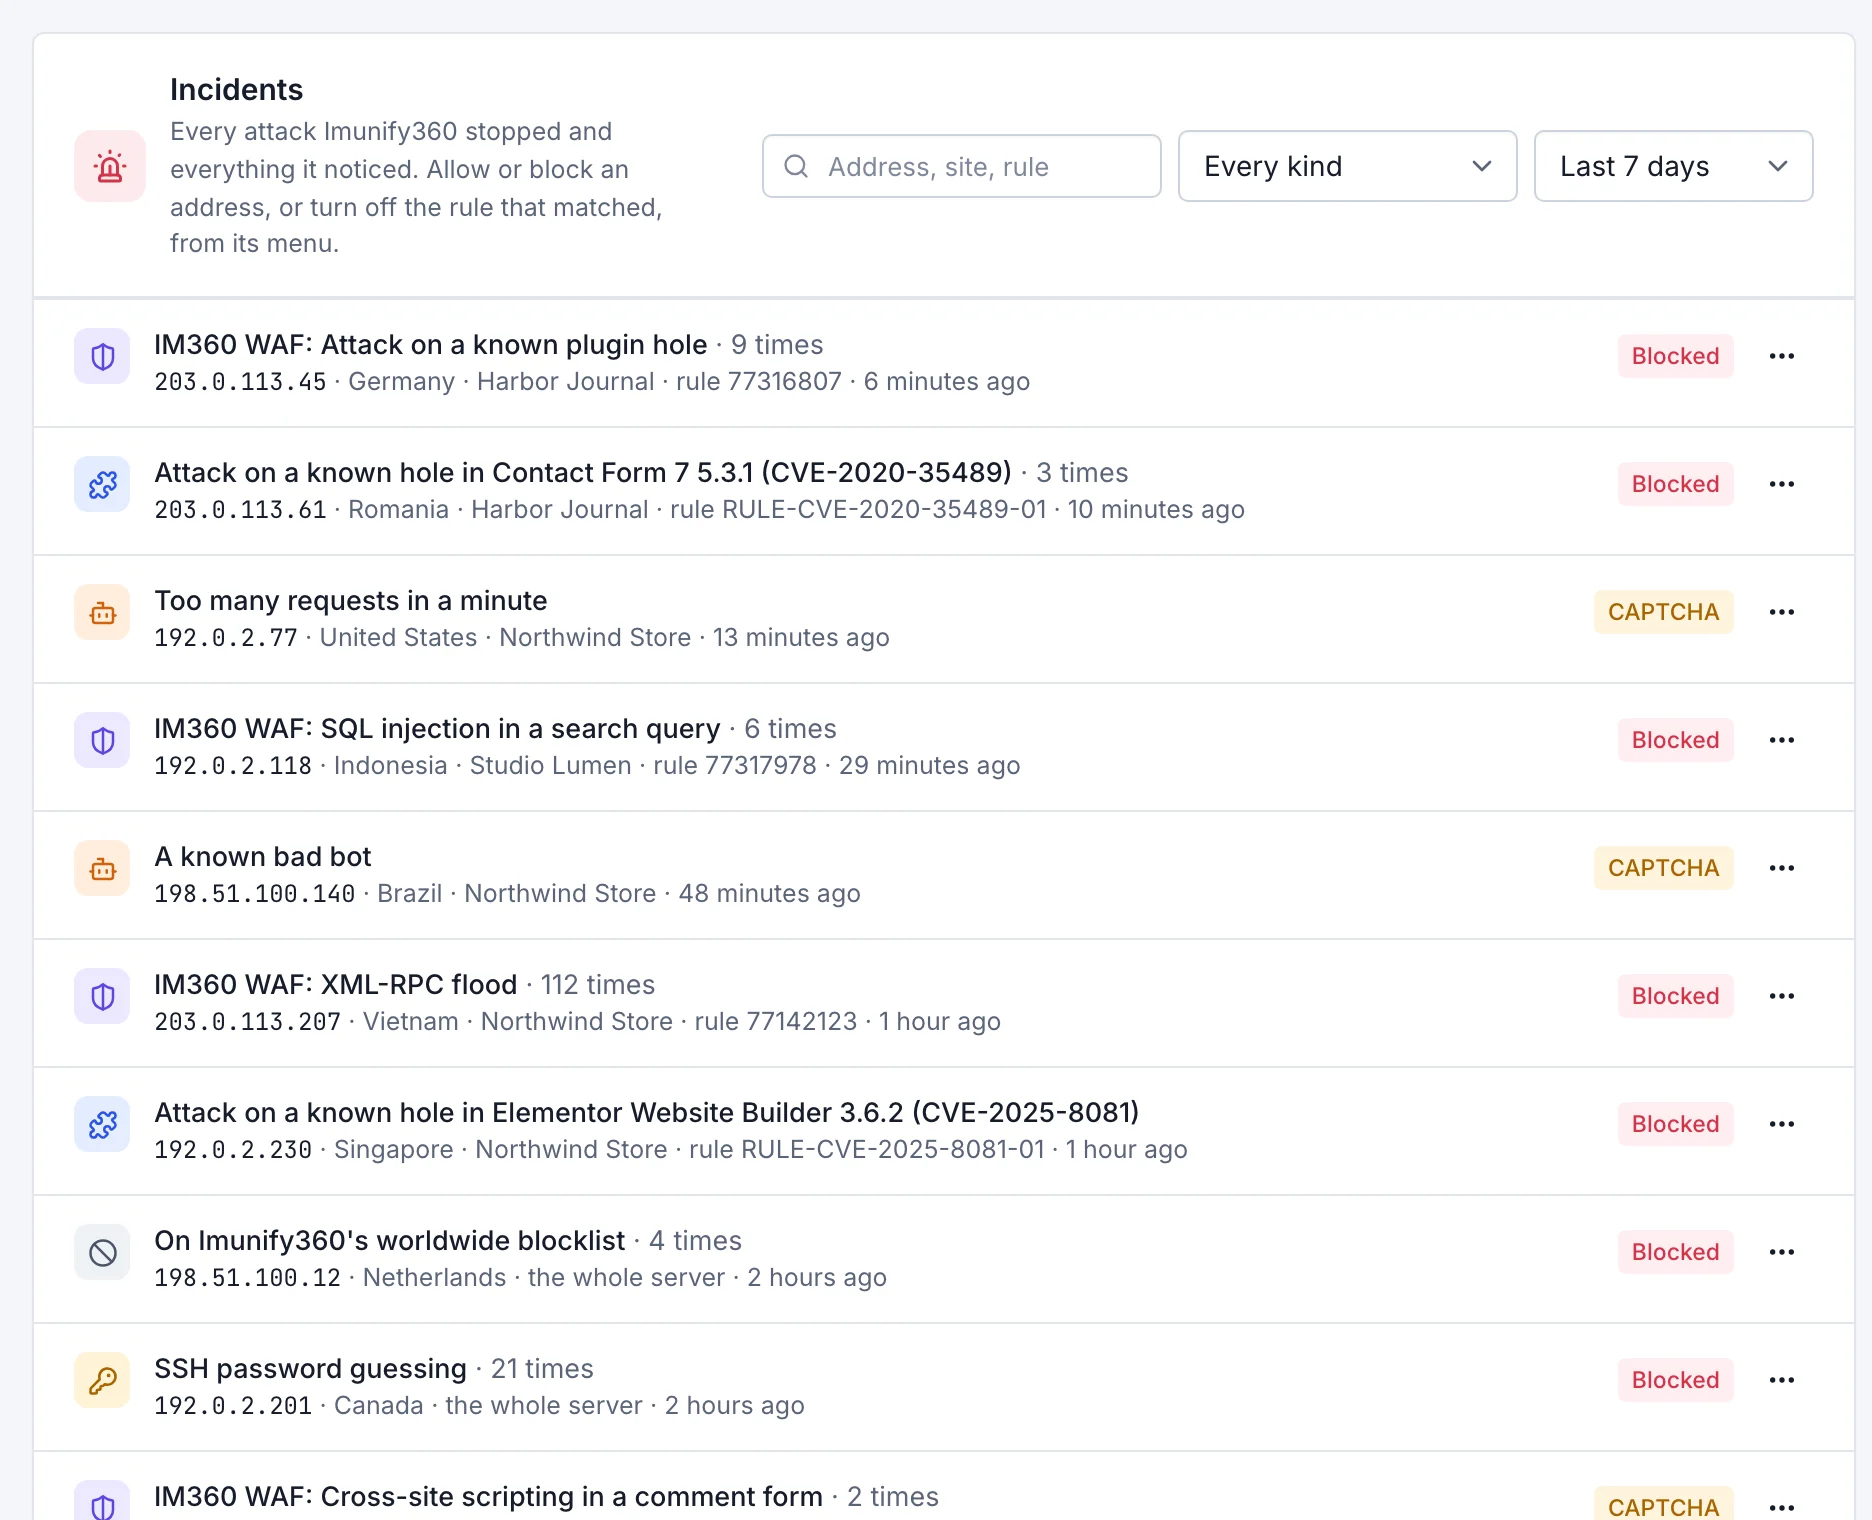
The Incidents tab lists every attack Imunify360 stopped or noticed: when, which site, the address and its country, and the rule that matched. If something of yours was stopped, open the incident's menu and allow the address, or turn the rule that matched off for that site only. Your office and your uptime monitor can go on the always-allowed list on the Firewall tab.
Attacks the WordPress plugin stopped are listed too, as WordPress attack, with the plugin or theme that was attacked. For those, turn the rule off for the site from the incident's menu: allowing the address doesn't let it past the plugin.
A site's Imunify360 tab
Each site has its own tab: its malware scanning switch, its threats and clean-ups, its plugins and themes with known holes, its scans, the incidents on it, its email alerts, which you can turn off for that site, and the WordPress plugin's settings for it.
Turn it off
On the Settings tab, choose Turn off Imunify360. It's removed from the server in a few minutes, along with its WordPress plugin from every site, your sites go back to the standard web application firewall rules, and charges for extra sites stop.