
Speed up WordPress with RabbitPress Cache
Install our cache plugin in one click, check that nginx sends your pages, and switch on its strongest speed-ups.
5 min read Updated
RabbitPress Cache is our WordPress speed plugin. It saves each page once and sends that copy to every visitor, then makes the page itself lighter: it removes unused CSS, delays JavaScript, lazy loads images and videos, and hosts Google Fonts on your own site. On a Rabbitflare server, nginx sends the saved pages straight from disk, without starting PHP. It's free for every site on a Rabbitflare cloud server, and $49 a year for a website anywhere else (see the RabbitPress Cache page).
 nginx sends the saved copy from disk, without PHP
  WordPress only for logged-in visitors, carts, checkouts and searches
 Install it on a Rabbitflare site
-
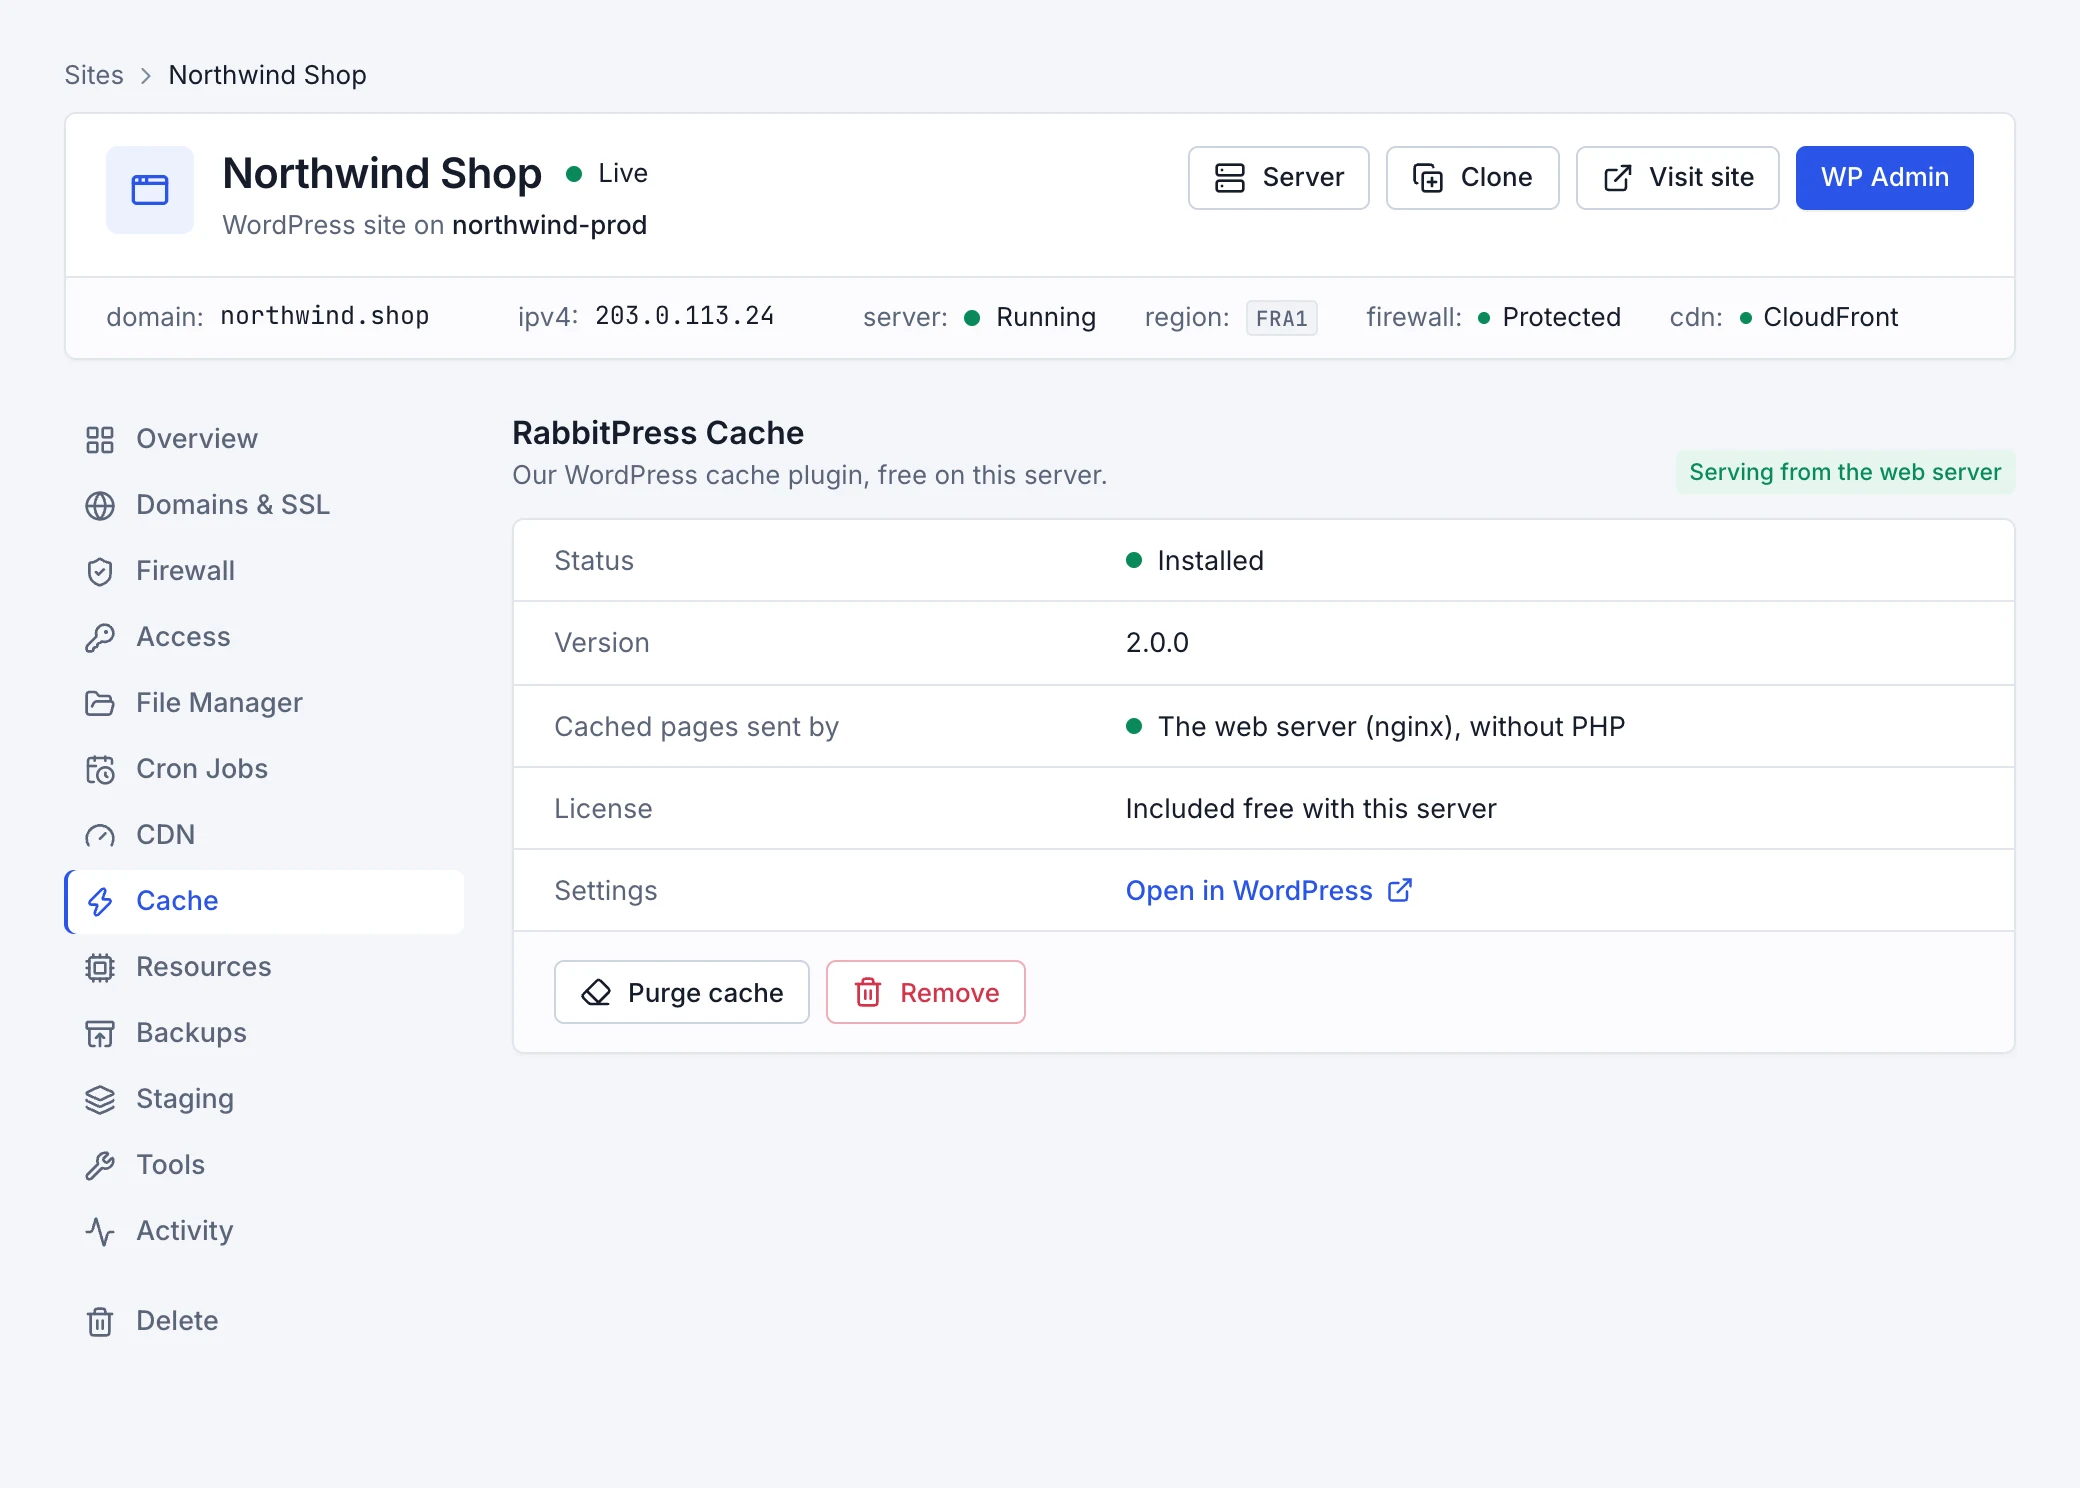
Open the site's Cache tab
On the site's page in the panel, open Cache. The tab is there for live sites on a running server.
-
Choose Install RabbitPress Cache
The plugin is installed and switched on for you, with safe settings. It takes under a minute, and you can leave the page meanwhile. Sites on DigitalOcean, Vultr, Hetzner and Rabbitflare Edge servers don't need a license.
-
That's it
Pages are cached as visitors arrive, and the preloader caches the rest in the background. The tab shows the plugin's version and who sends the cached pages: The web server (nginx), without PHP once the server has taken the plugin's rules, which is usually within a minute.
Sites on your own servers and other hosts
A site on a server you connected to Rabbitflare yourself, or at any other host, needs a license: $49 a year for one website. Staging and
local copies, like staging.example.com or example.local, don't use it up.
-
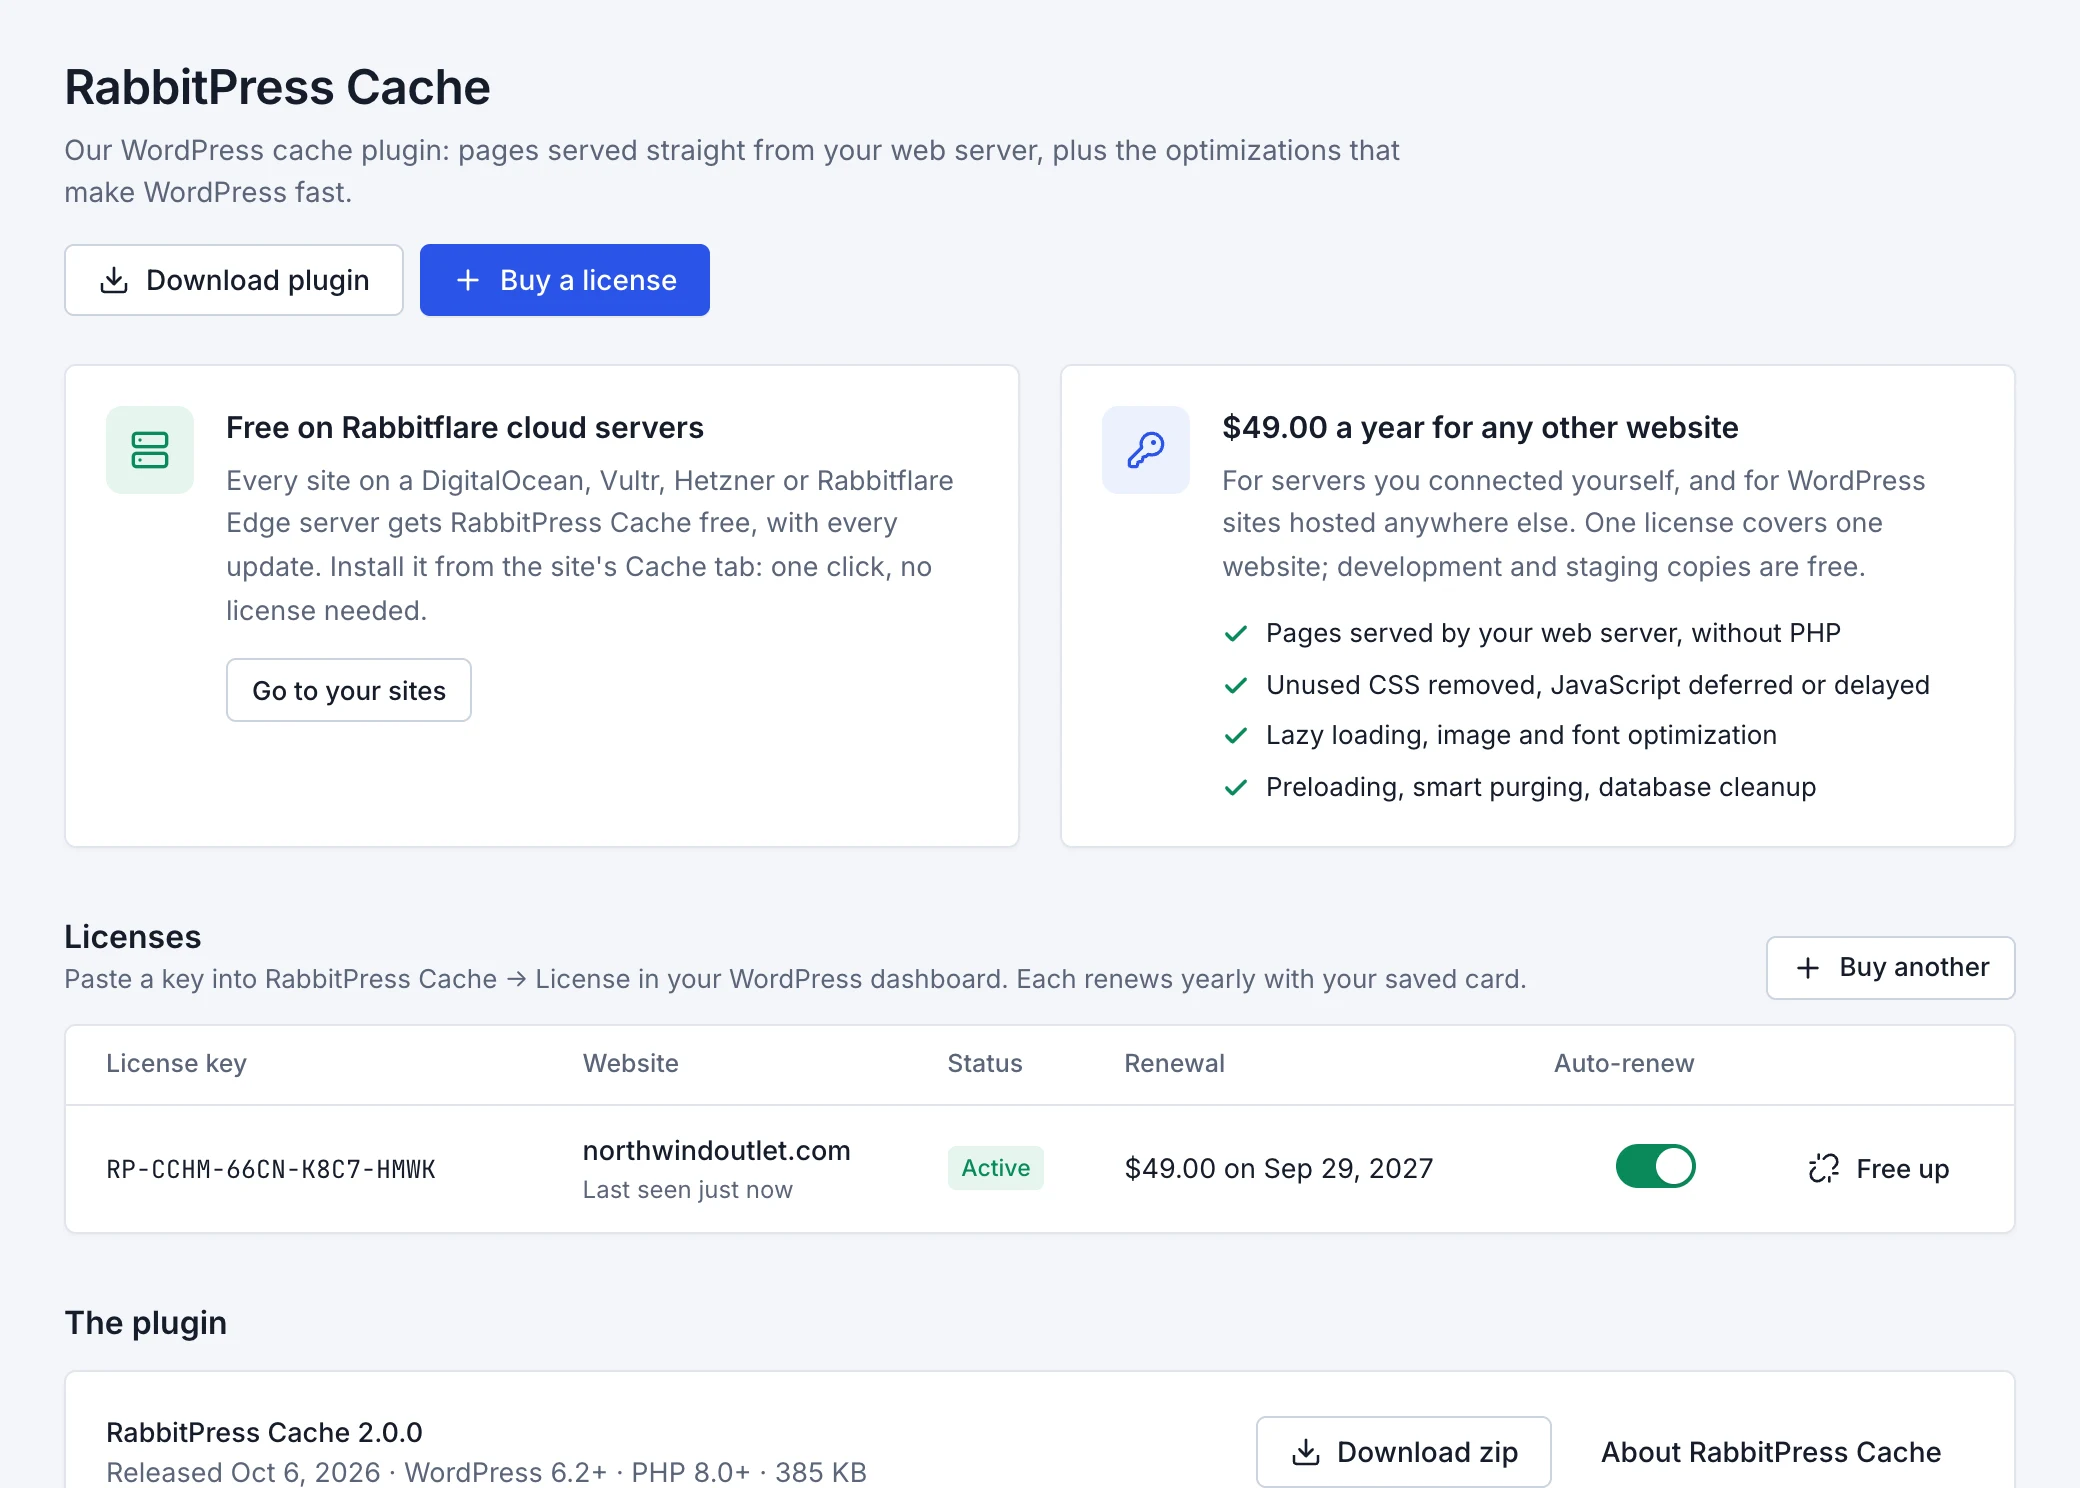
Buy a license
In the panel, open RabbitPress Cache in the sidebar and choose Buy a license. It's paid from your wallet first, then by card, and the key is shown straight away and emailed to you. Anyone can create a free Rabbitflare account to buy one.
-
Install the plugin
On a server you connected to Rabbitflare, open the site's Cache tab, pick the license and choose Install RabbitPress Cache: the key is entered for you. Anywhere else, choose Download plugin, then in WordPress go to Plugins → Add New → Upload Plugin, upload the zip and activate it.
-
Activate the license
In WordPress, open RabbitPress → License, paste the key and choose Activate. The licenses table in the panel then shows which website uses each key.
Check that it's working
Open the site in a private window (logged-in visitors always get fresh pages), then look in any of these places:
- The site's Cache tab in the panel, under Cached pages sent by.
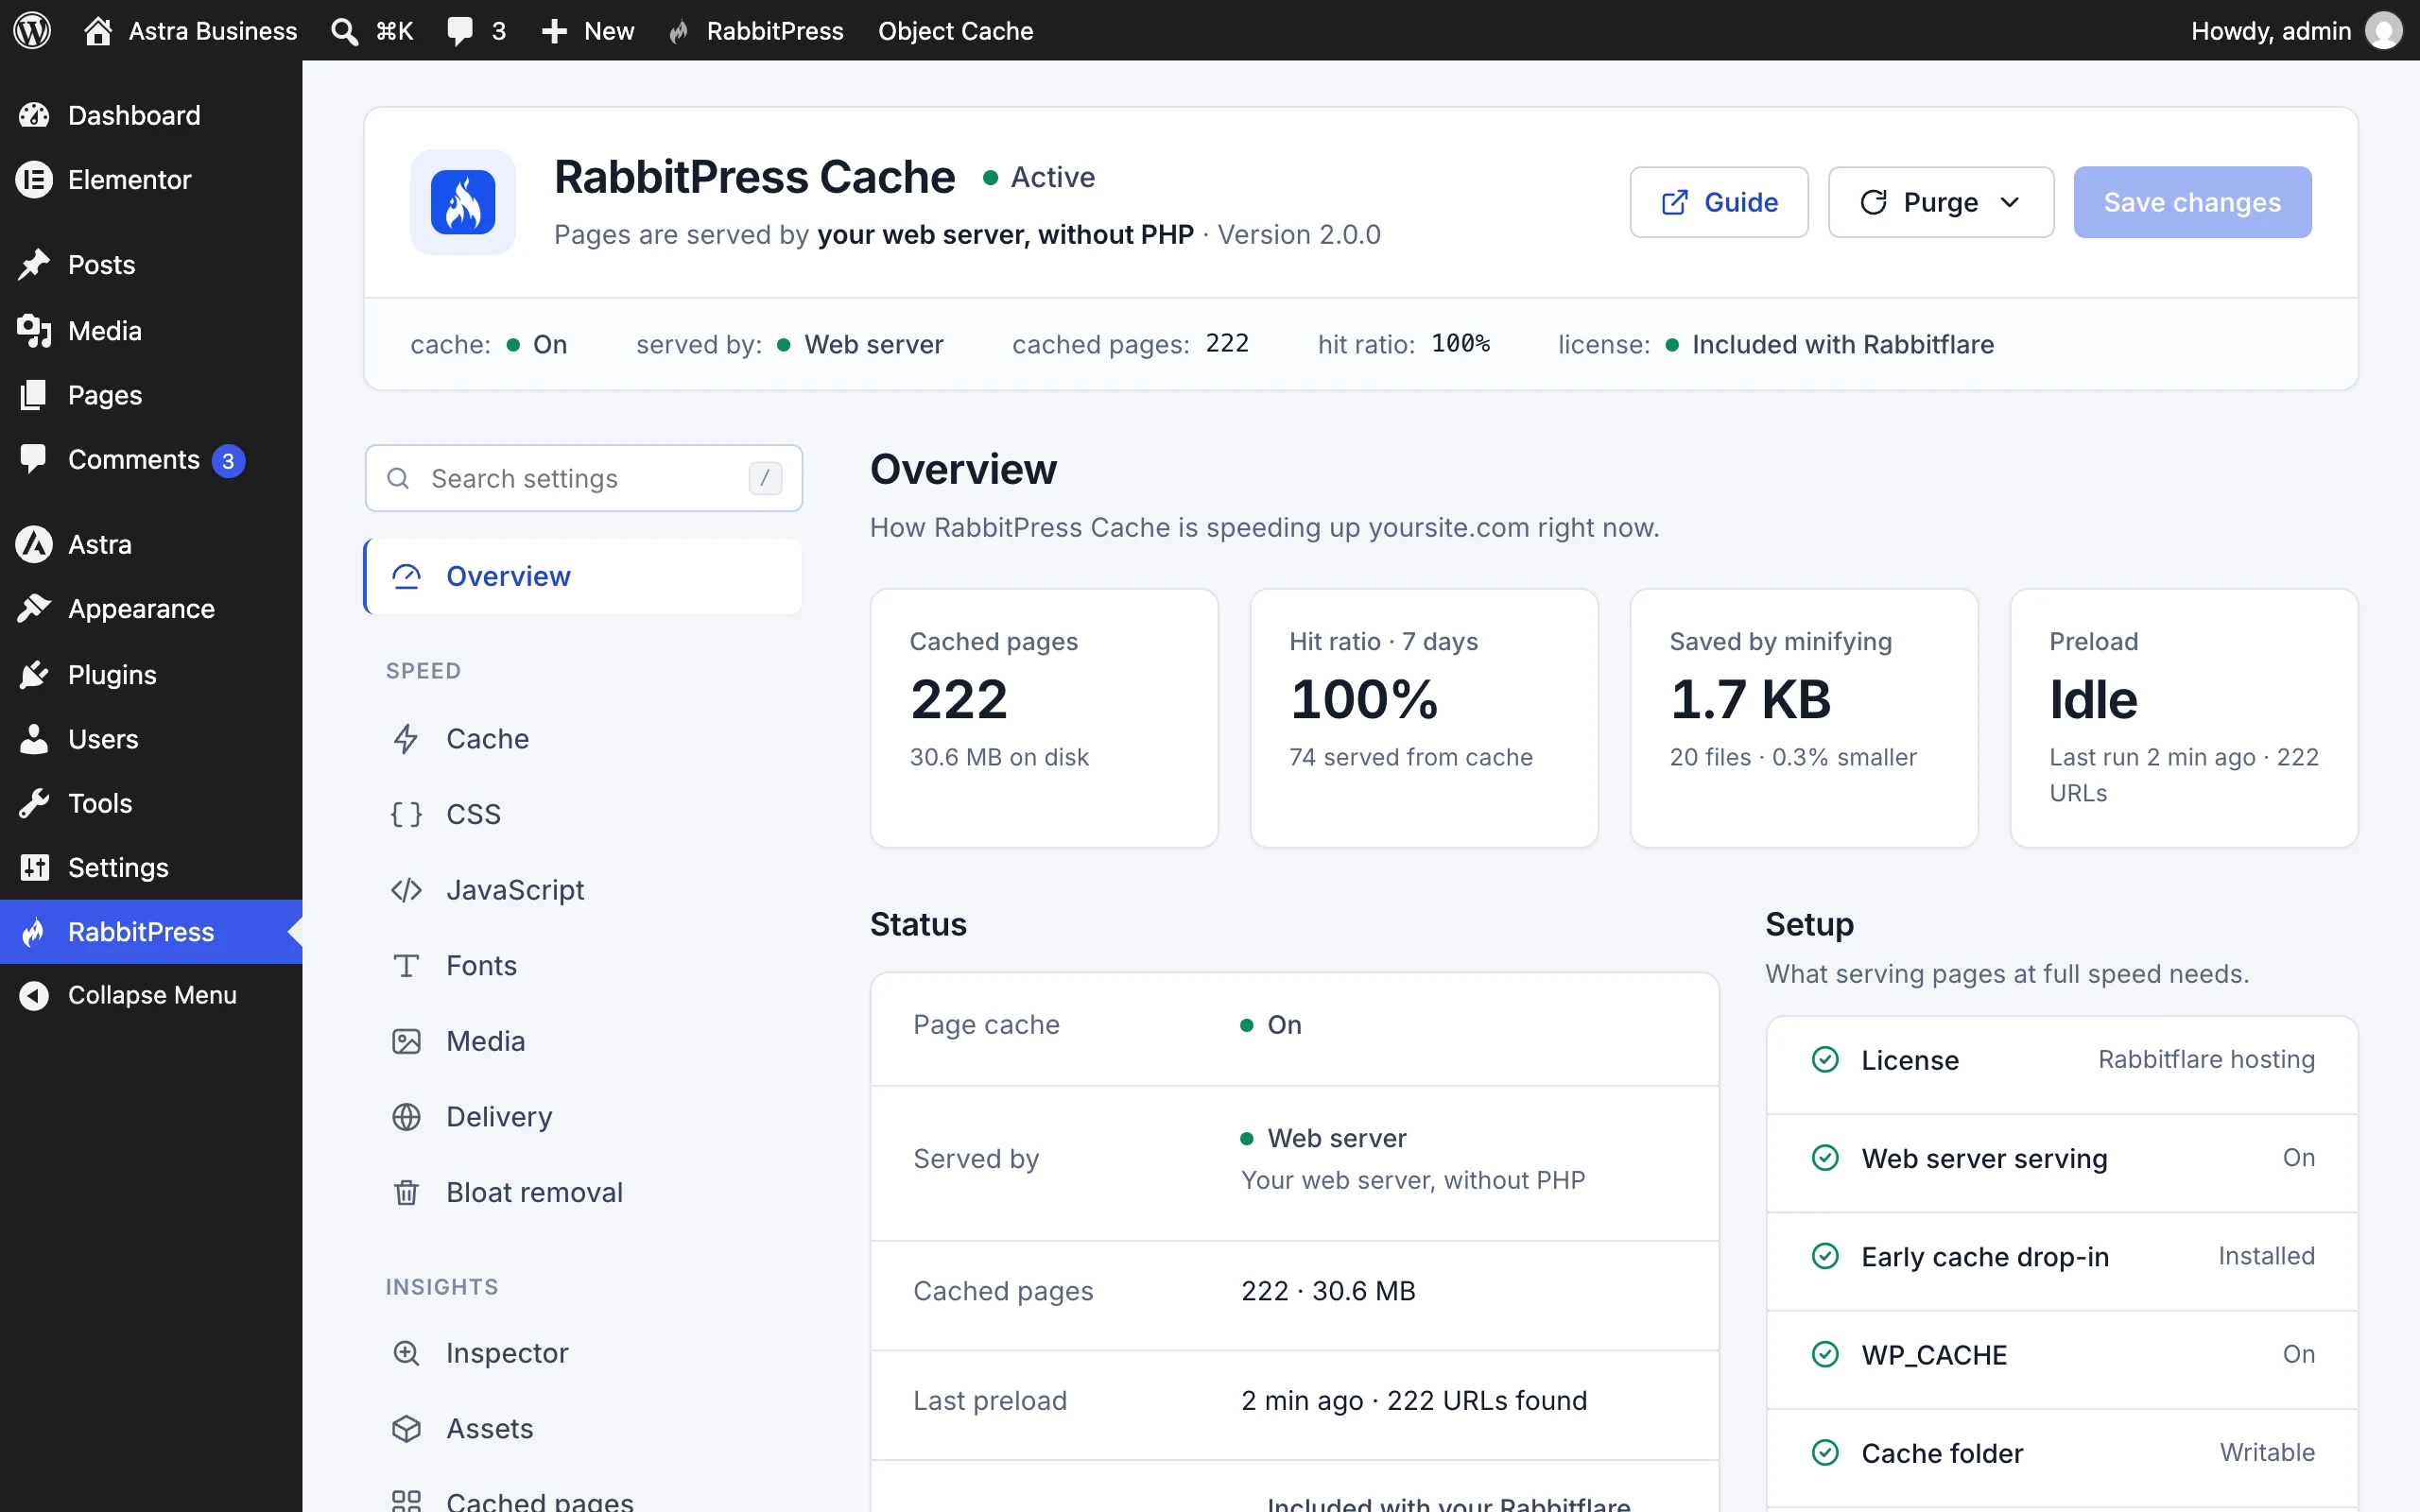
- RabbitPress → Overview in WordPress: how many pages are cached, how often visitors get them, and who sends them.
-
The page's response headers, in your browser's developer tools:
X-RabbitPress-Cache: HITmeans the page came from the cache, and on Rabbitflare serversX-RabbitPress-Source: Web Servermeans nginx sent it.
Make it faster still
The page cache, preloading, CSS and JavaScript minifying, deferred scripts, lazy loading and font hosting are on from the start. Two options make the biggest difference on most sites, and are yours to switch on, because they change how a page loads:
- CSS → Remove unused CSS: each page gets only the CSS it uses, inline, and the rest loads later.
- JavaScript → Delay JavaScript: scripts like chat widgets, analytics and sliders wait for the first tap, scroll or key press.
After switching one on, open a few pages in a private window and check menus, sliders, forms and pop-ups. If something misbehaves, leave its file, script or page out under the same option, or use Inspector to see exactly what changed on a page.
Clear the cache
Usually there's nothing to do. When you publish or edit a post, RabbitPress clears that page and every archive and list that shows it, then caches them again. When you need a fresh start, after changing a theme's settings for example:
- choose Purge cache in the site's Cache tab in the panel (the Purge cache tool in the site's tools does the same), or
- use RabbitPress in WordPress's top toolbar: Purge this page, Purge page cache or Purge everything (pages + assets).
Manage licenses
Each license covers one live website for a year. In the panel's RabbitPress Cache page you can:
- turn Auto-renew on or off: with it on, the license renews a week before it ends, from your wallet or saved card;
- choose Renew to renew straight away, if auto-renew is off or the license has ended;
- choose Free up to move a license to another website: the old site stops using it at its next daily check.
When a license ends, the site keeps working normally, just without RabbitPress's speed-ups, and its settings are kept. Renewing switches them back on.
Remove it
In the site's Cache tab, choose Remove. The plugin is deactivated and deleted with its cache, and the server's rules for it are removed. The site keeps working, just without the cache, and you can install it again at any time.