
Quick start
Create your account, build a server and put your first WordPress site live in about ten minutes.
4 min read Updated
In this guide you'll create your account, build a server with a WordPress site on it, sign in to WordPress and connect your domain. Most of the waiting is the server being built, which takes about five minutes.
Create your account
-
Sign up
Go to app.rabbitflare.com/signup and enter your name, email address and a password of at least 10 characters. Or skip the password and sign up with Google or GitHub.
-
Confirm your email address
We email you a confirmation link. Click it: you need a confirmed address to create servers. If it hasn't arrived, use Resend email on the notice at the top of the panel.
Create a server
Choose Create Server at the top of the panel, or Create server on the Servers page. One page holds every choice:
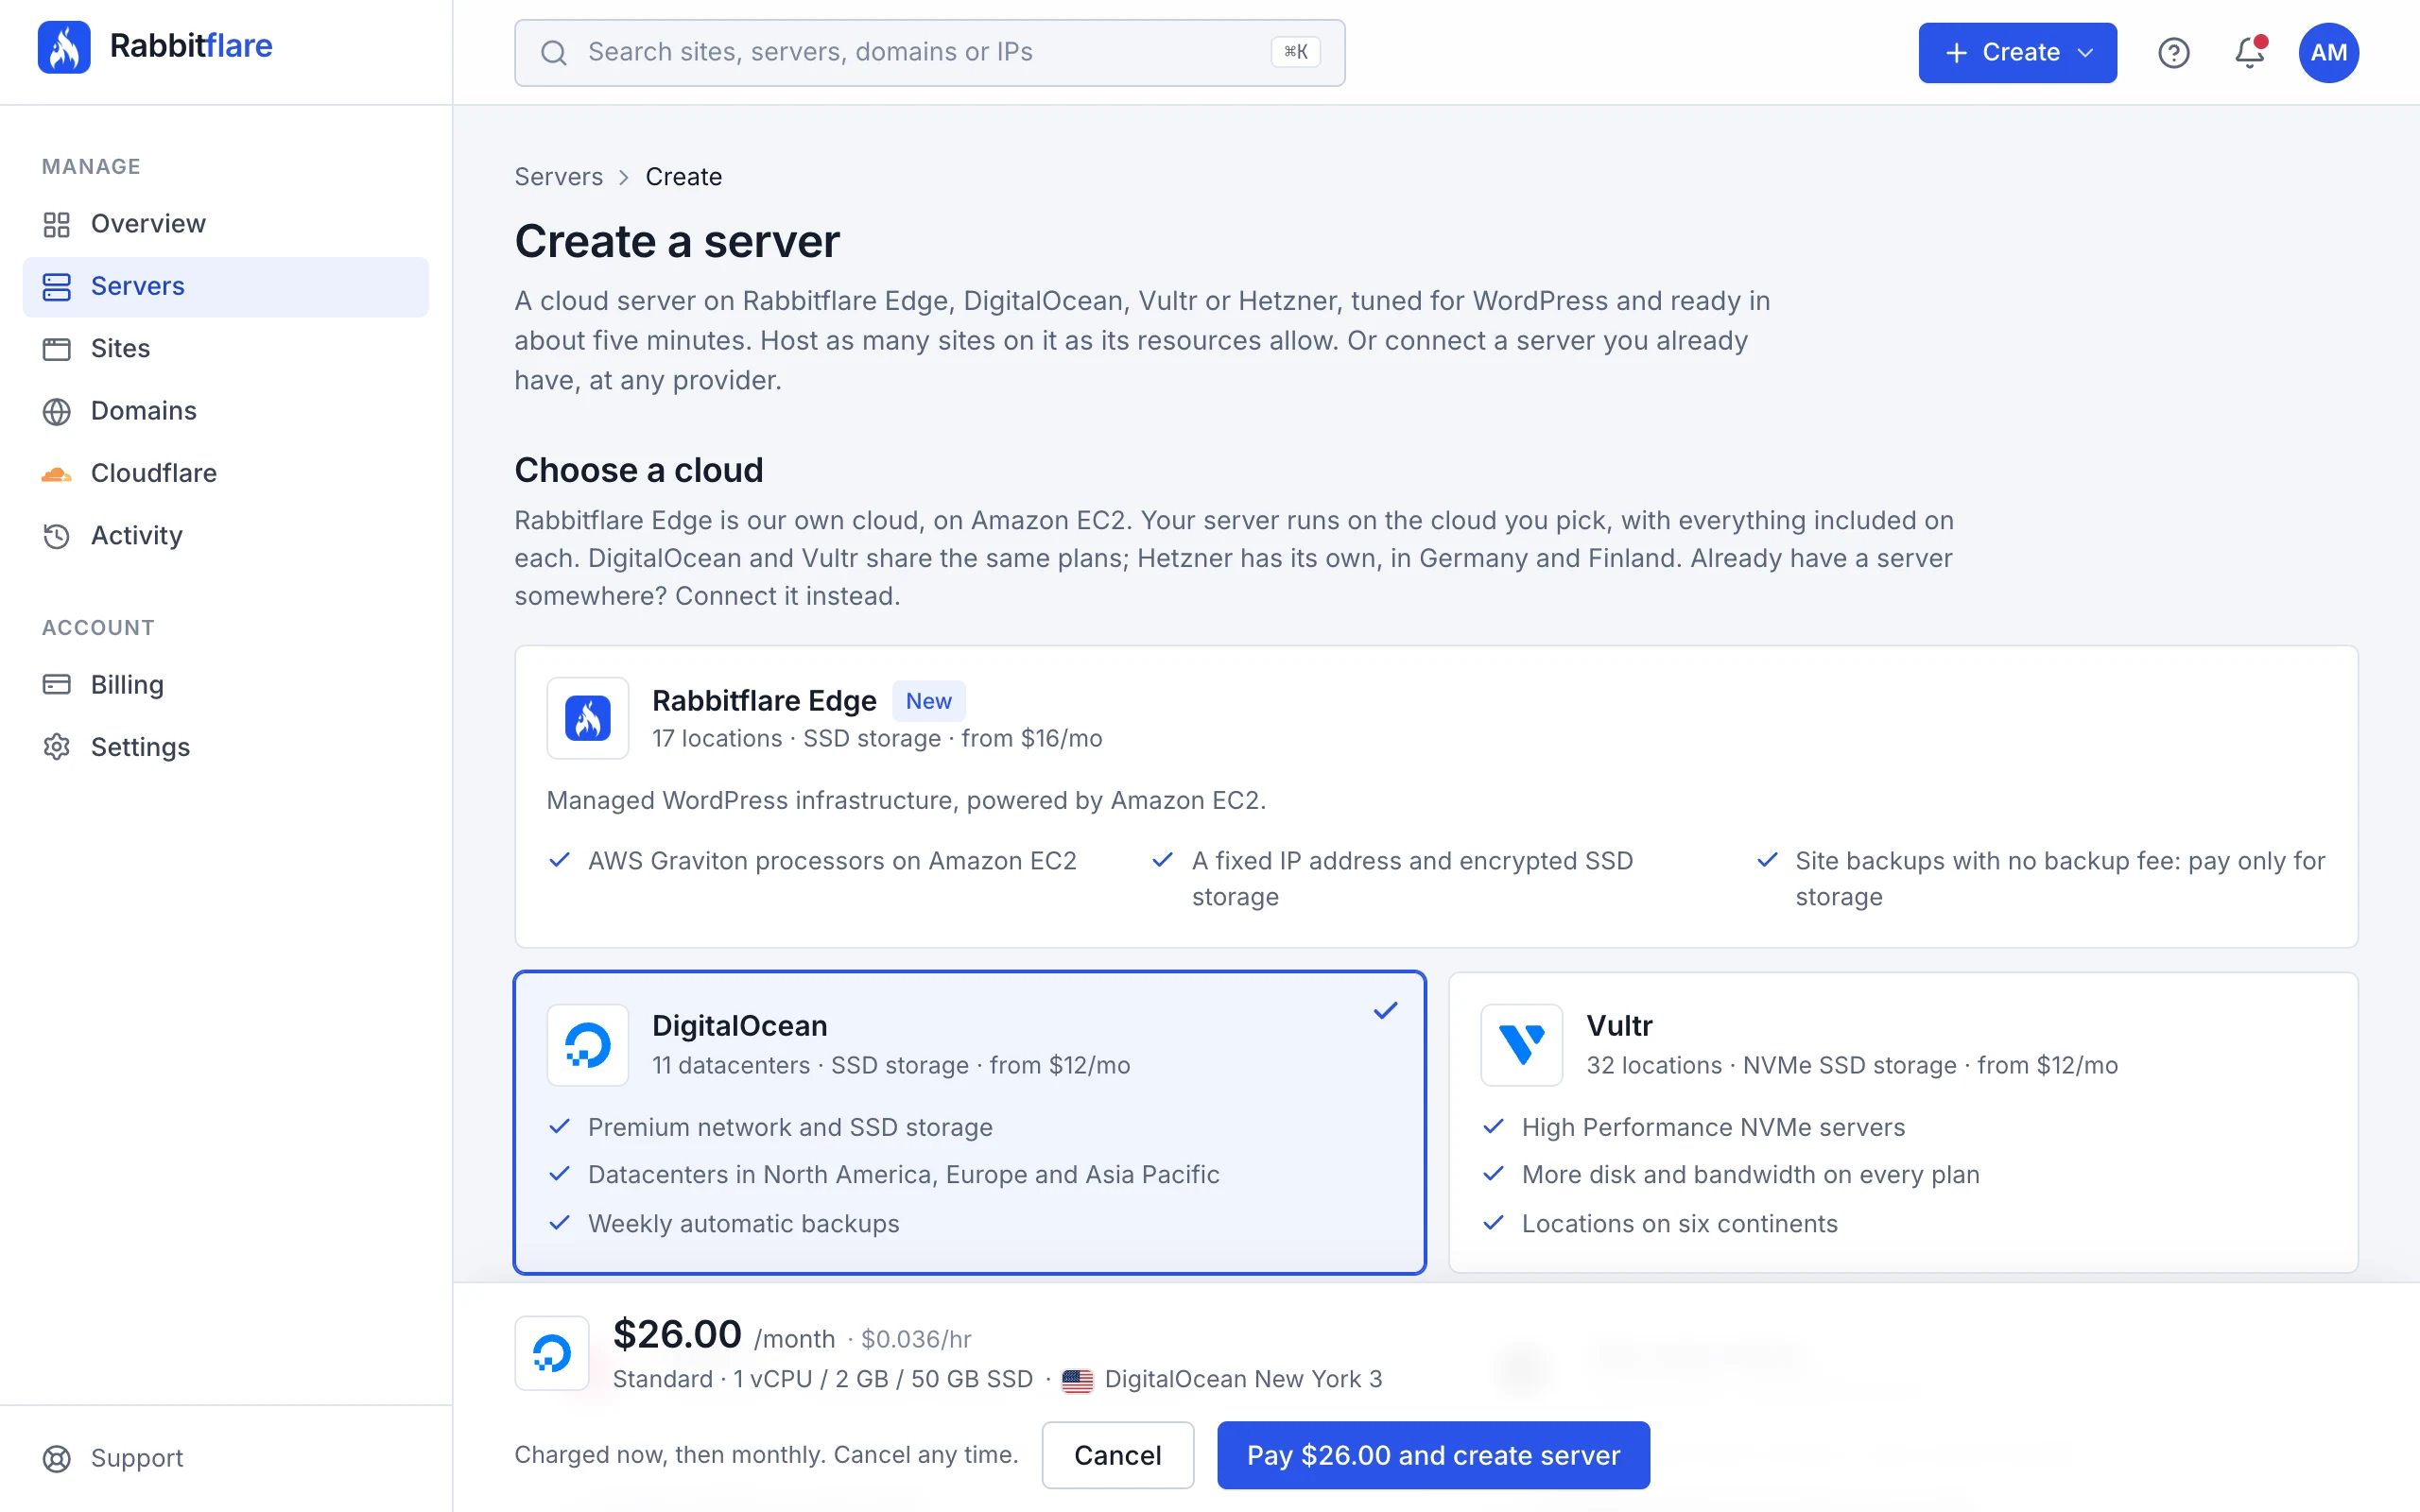
-
Choose a cloud
DigitalOcean, Vultr, Hetzner or Rabbitflare Edge. Everything Rabbitflare includes is the same on each; they differ in locations and plan sizes. Not sure? Choose a cloud, location and plan explains the differences.
-
Choose a location
Pick the location closest to most of your visitors. A size that has sold out in a location is marked, so you can pick another.
-
Choose a plan
A plan's CPU, memory and disk are your server's, shared by the sites on it. Start small if you like: you can resize to a larger plan later.
-
Name your server
Something you'll recognise, like
production-1. Only you see it. -
Set up your first WordPress site
Install a WordPress site on this server is on, so a site is installed as soon as the server is ready. Enter the site's name (shown in the panel), its title (shown to visitors), an admin username and an admin email. Avoid
adminas the username: it's the first name attackers try. A strong password is generated for you. -
Pay and create
Pay by card right on the page, or continue to PayPal. The first month is charged now and the server renews monthly; you can cancel at any time by destroying the server. The button at the bottom shows the amount, like Pay $26.00 and create server.
Wait for the server
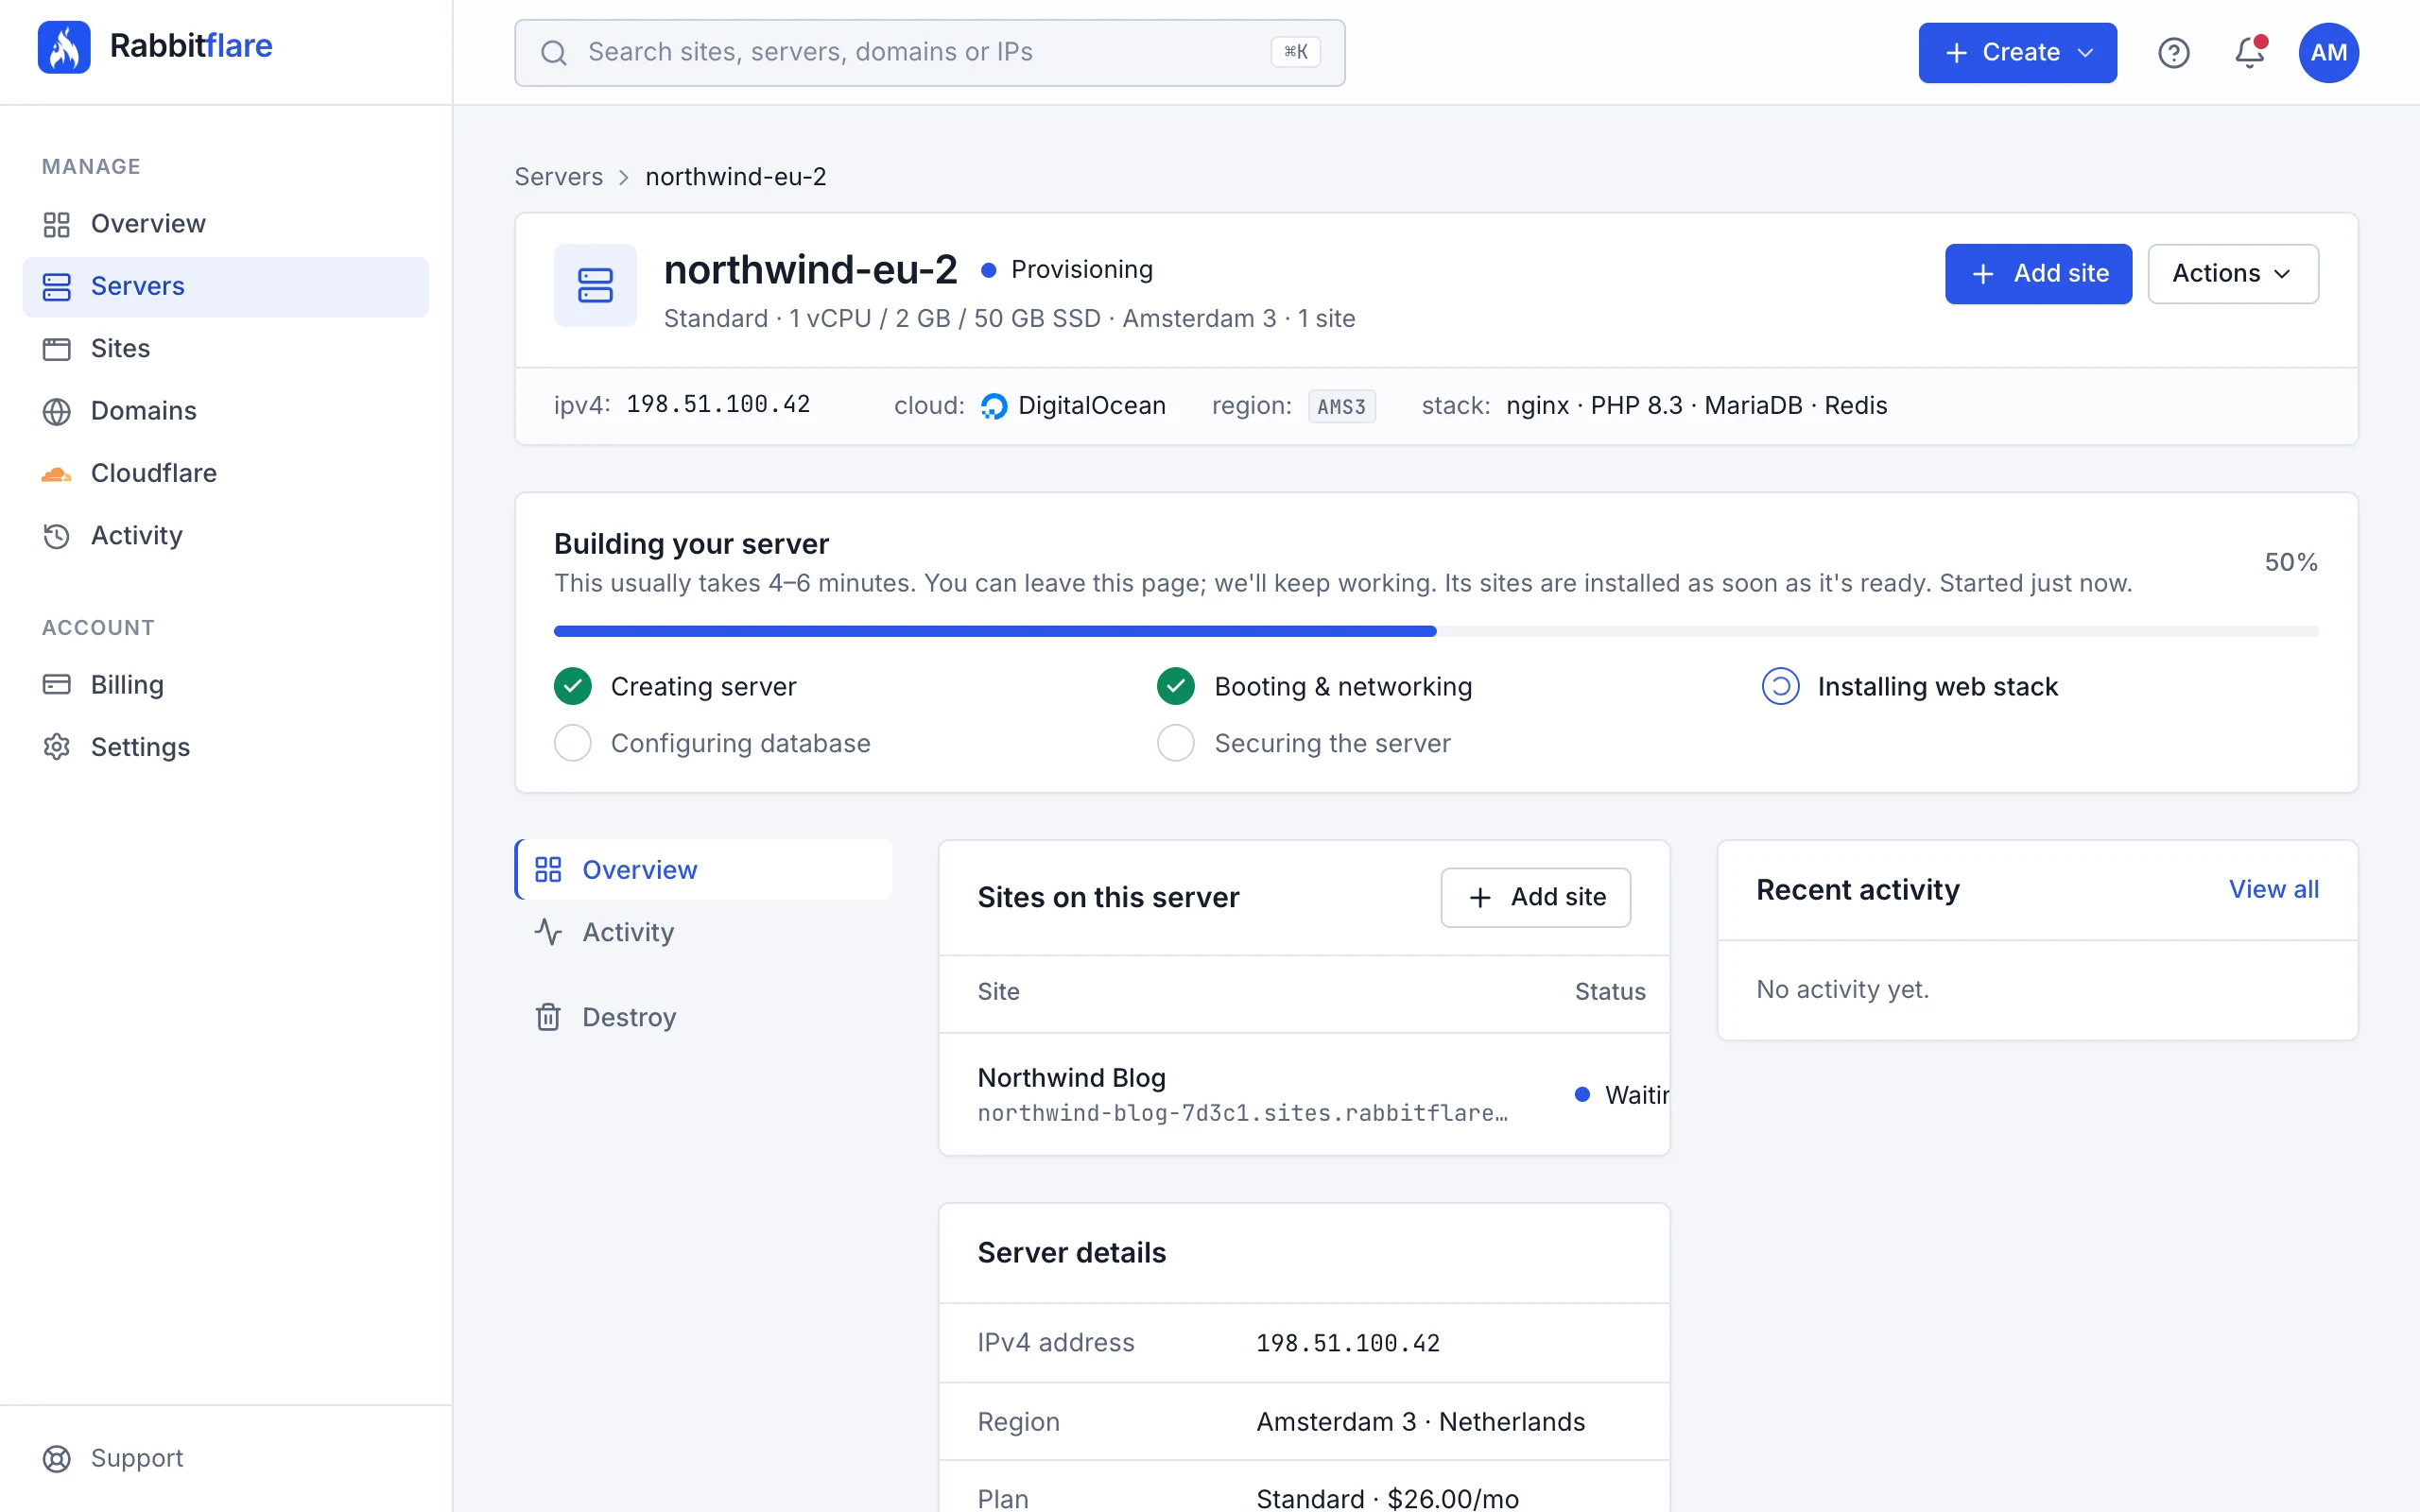
The server's page shows each step as it happens: creating the server, booting, installing the web stack, configuring the database and securing the server. It's usually done in about five minutes, and you can leave the page in the meantime. Then the site is installed: WordPress first, then its SSL certificate. We email you when the site is live.
Sign in to WordPress
Open the site from Sites. The WP Admin button at the top of its page signs you in to WordPress. The username and the generated password are on the site's Access tab: choose Show password to see it.
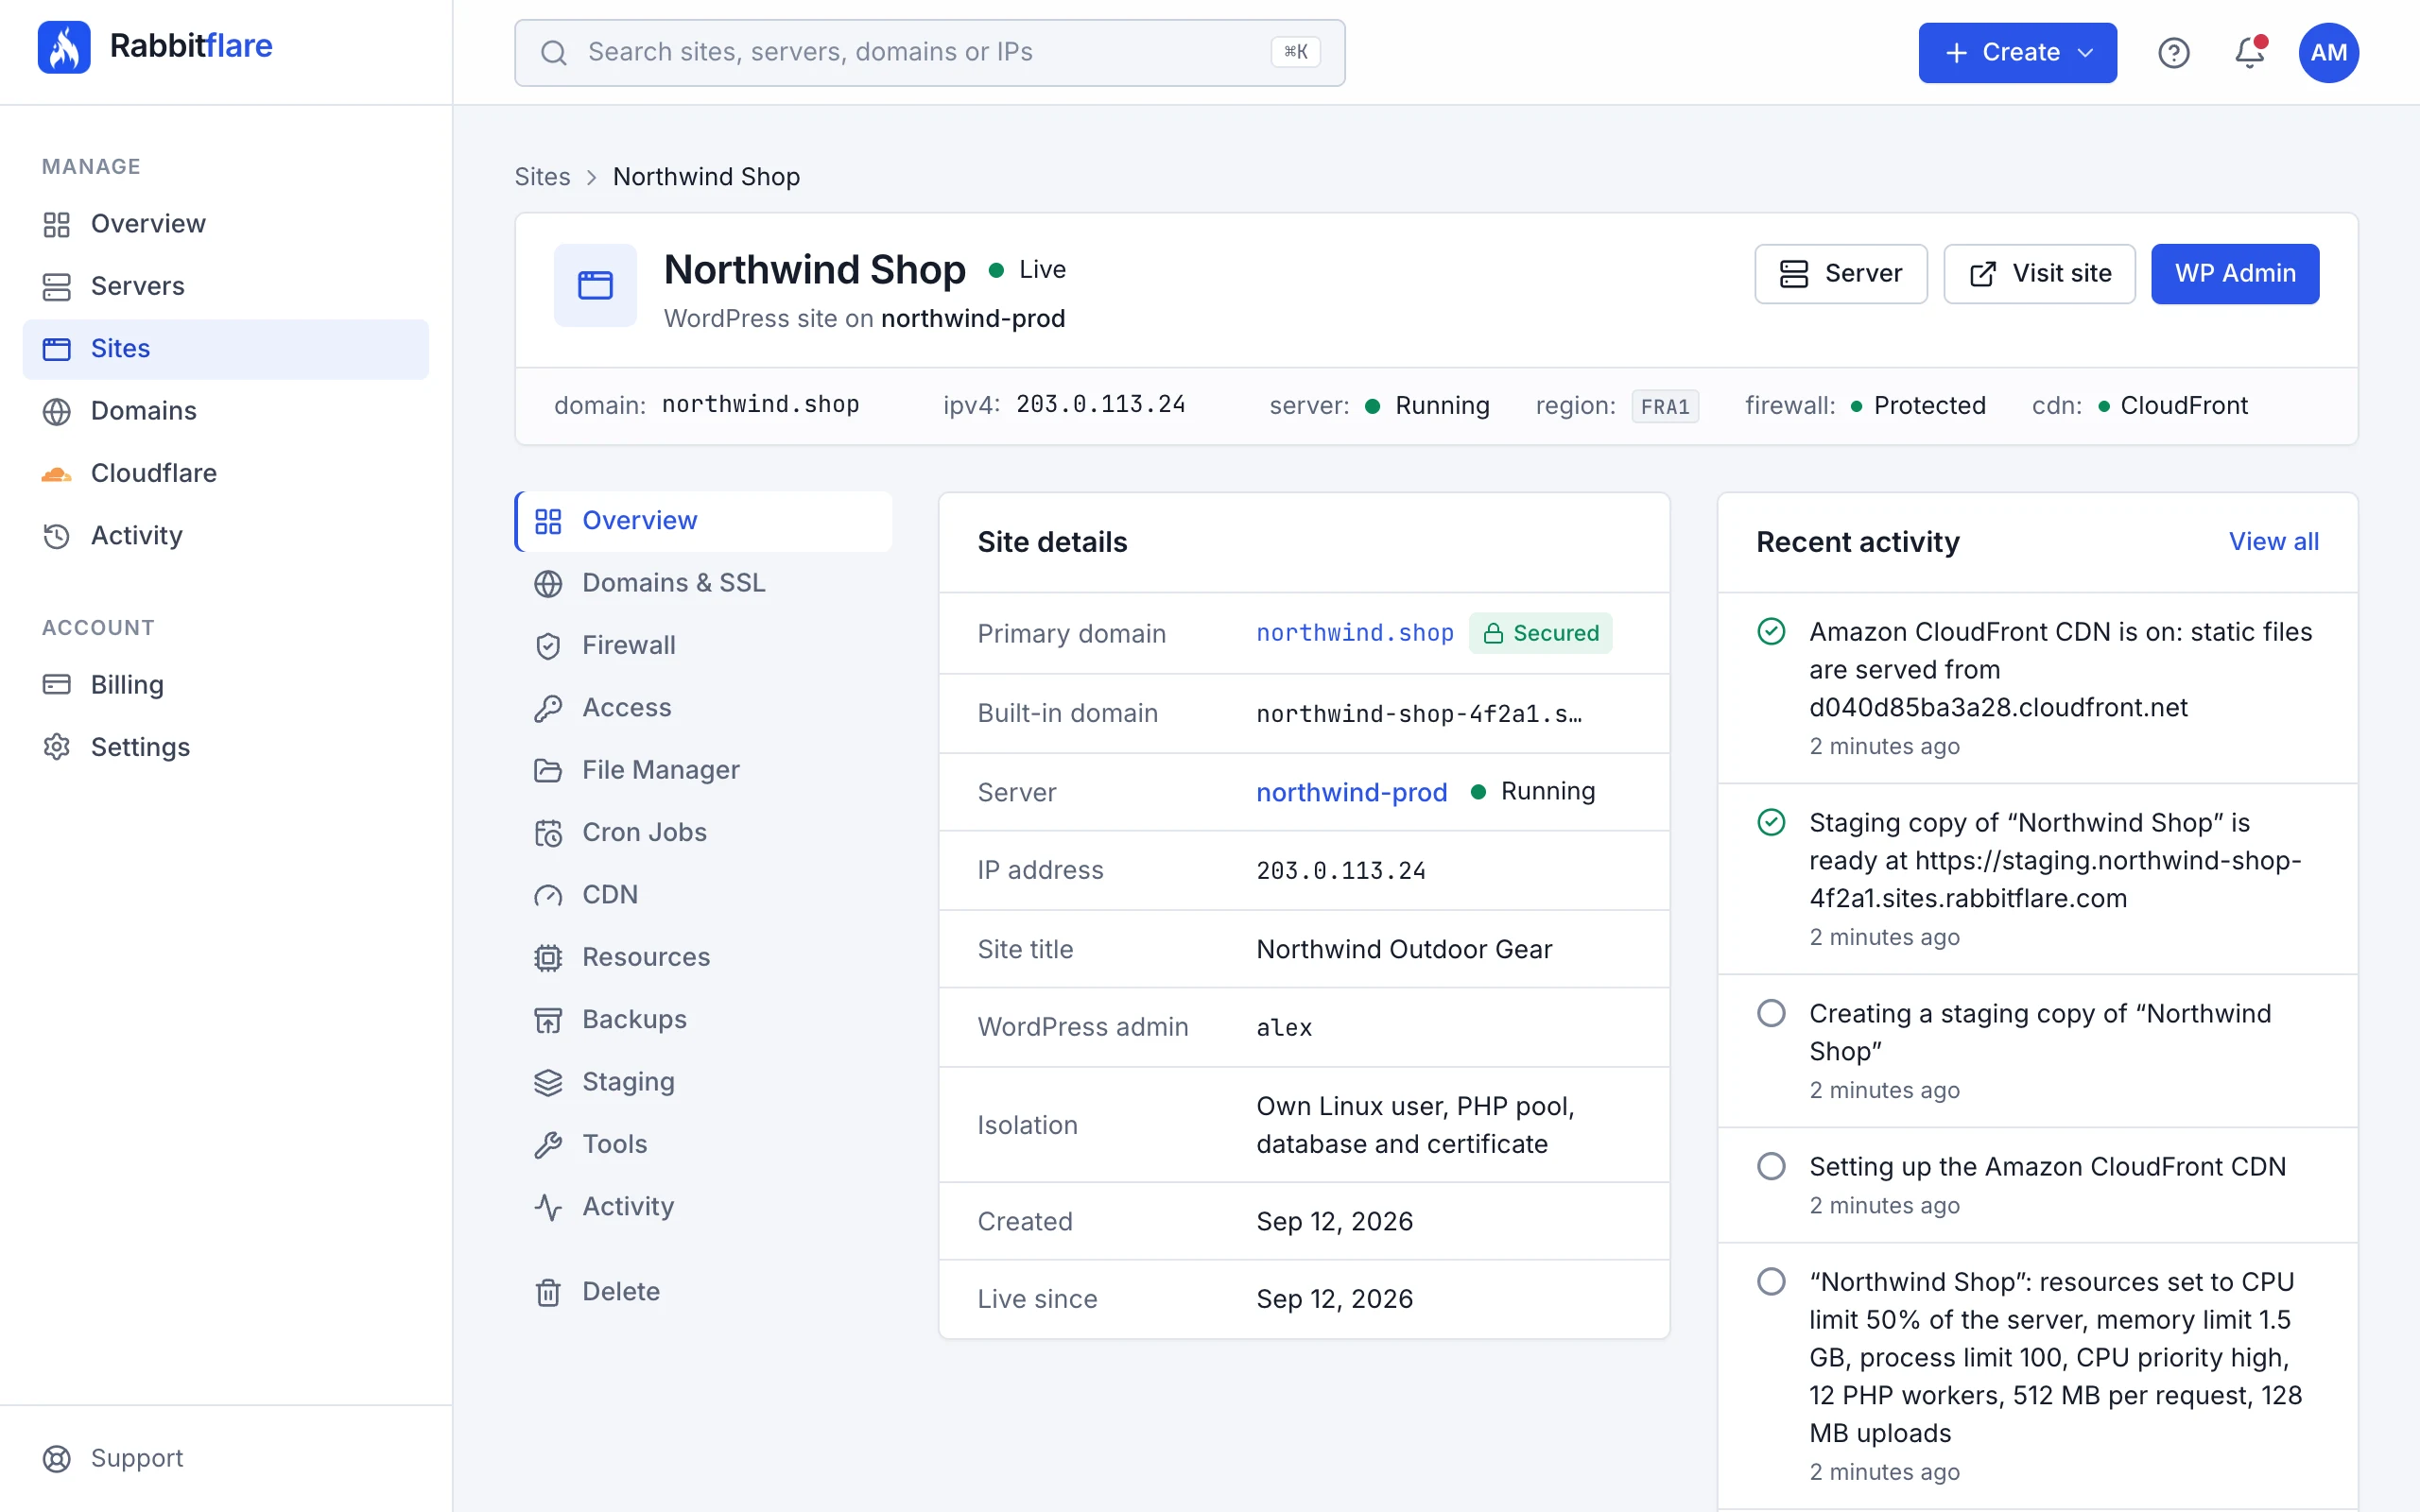
Your site is already live at its free address, like northwind-shop-4f2a1.sites.rabbitflare.com, with a valid certificate. You can
build it there, then connect your own domain when you're ready. Search engines are asked not to list free addresses, so your site appears in
search results once it's on your own domain.
Connect your domain
-
Add the domain to the site
On the site's Domains & SSL tab, type your domain (like
example.com) and choose Add domain. -
Point its DNS at your server
At the company that runs your domain's DNS, create the records the tab shows: an
Arecord with your server's IP address, and, if you like, anAAAArecord with its IPv6 address. Wantwww.example.comtoo? Add it to the site the same way, with its own record. -
Verify
Once the records are in place, choose Verify. The domain is checked, attached to the site and given a free SSL certificate, usually within a minute. Make it the primary domain and WordPress switches to it, with your other addresses redirecting there.
The full guide, with the exact records and what to do when a domain won't verify, is Connect your domain.
Next steps
Your site is live. A few things worth setting up next: