
Connect your own server
Bring a server you already have, at any provider, and let Rabbitflare set it up and look after it.
3 min read Updated
Already have a server at AWS, Google Cloud, Azure, Oracle, DigitalOcean, Hetzner, Vultr or anywhere else? Connect it with one command and Rabbitflare sets it up for WordPress and looks after it, exactly like the servers we create. One plan of $3.50 a month covers every server you connect, with unlimited sites on them.
What the server needs
- A fresh Ubuntu 24.04 LTS install, on x86-64 or ARM64.
- At least 1 GB of memory and 20 GB of disk.
- An account that can sign in over SSH as root, or a user with sudo.
- Incoming TCP ports 80, 443 and 22022 open (see open the ports below).
Connect it
-
Add the server in the panel
Choose Create Your own server . Give it a name, enter its public IPv4 address, and, if you like, the WordPress site to install once it's connected.
-
Start the Own servers plan
Your first own server starts the plan, paid by card or PayPal. Servers you add later are included at no extra cost while the plan is active. Then choose the button at the bottom: Pay $3.50 and add server for your first, or Add server when the plan already covers it.
-
Run the command on the server
The server's page shows one command. Sign in to the server over SSH as root or a user with sudo, paste the command and press Enter. No passwords are shared with Rabbitflare. Keep the command private: it connects the server to your account.
-
Watch it connect
The page follows along: checking your server, installing the web stack, configuring the database, securing the server and connecting to Rabbitflare. If the command stops with an error, fix what it says and run the same command again.
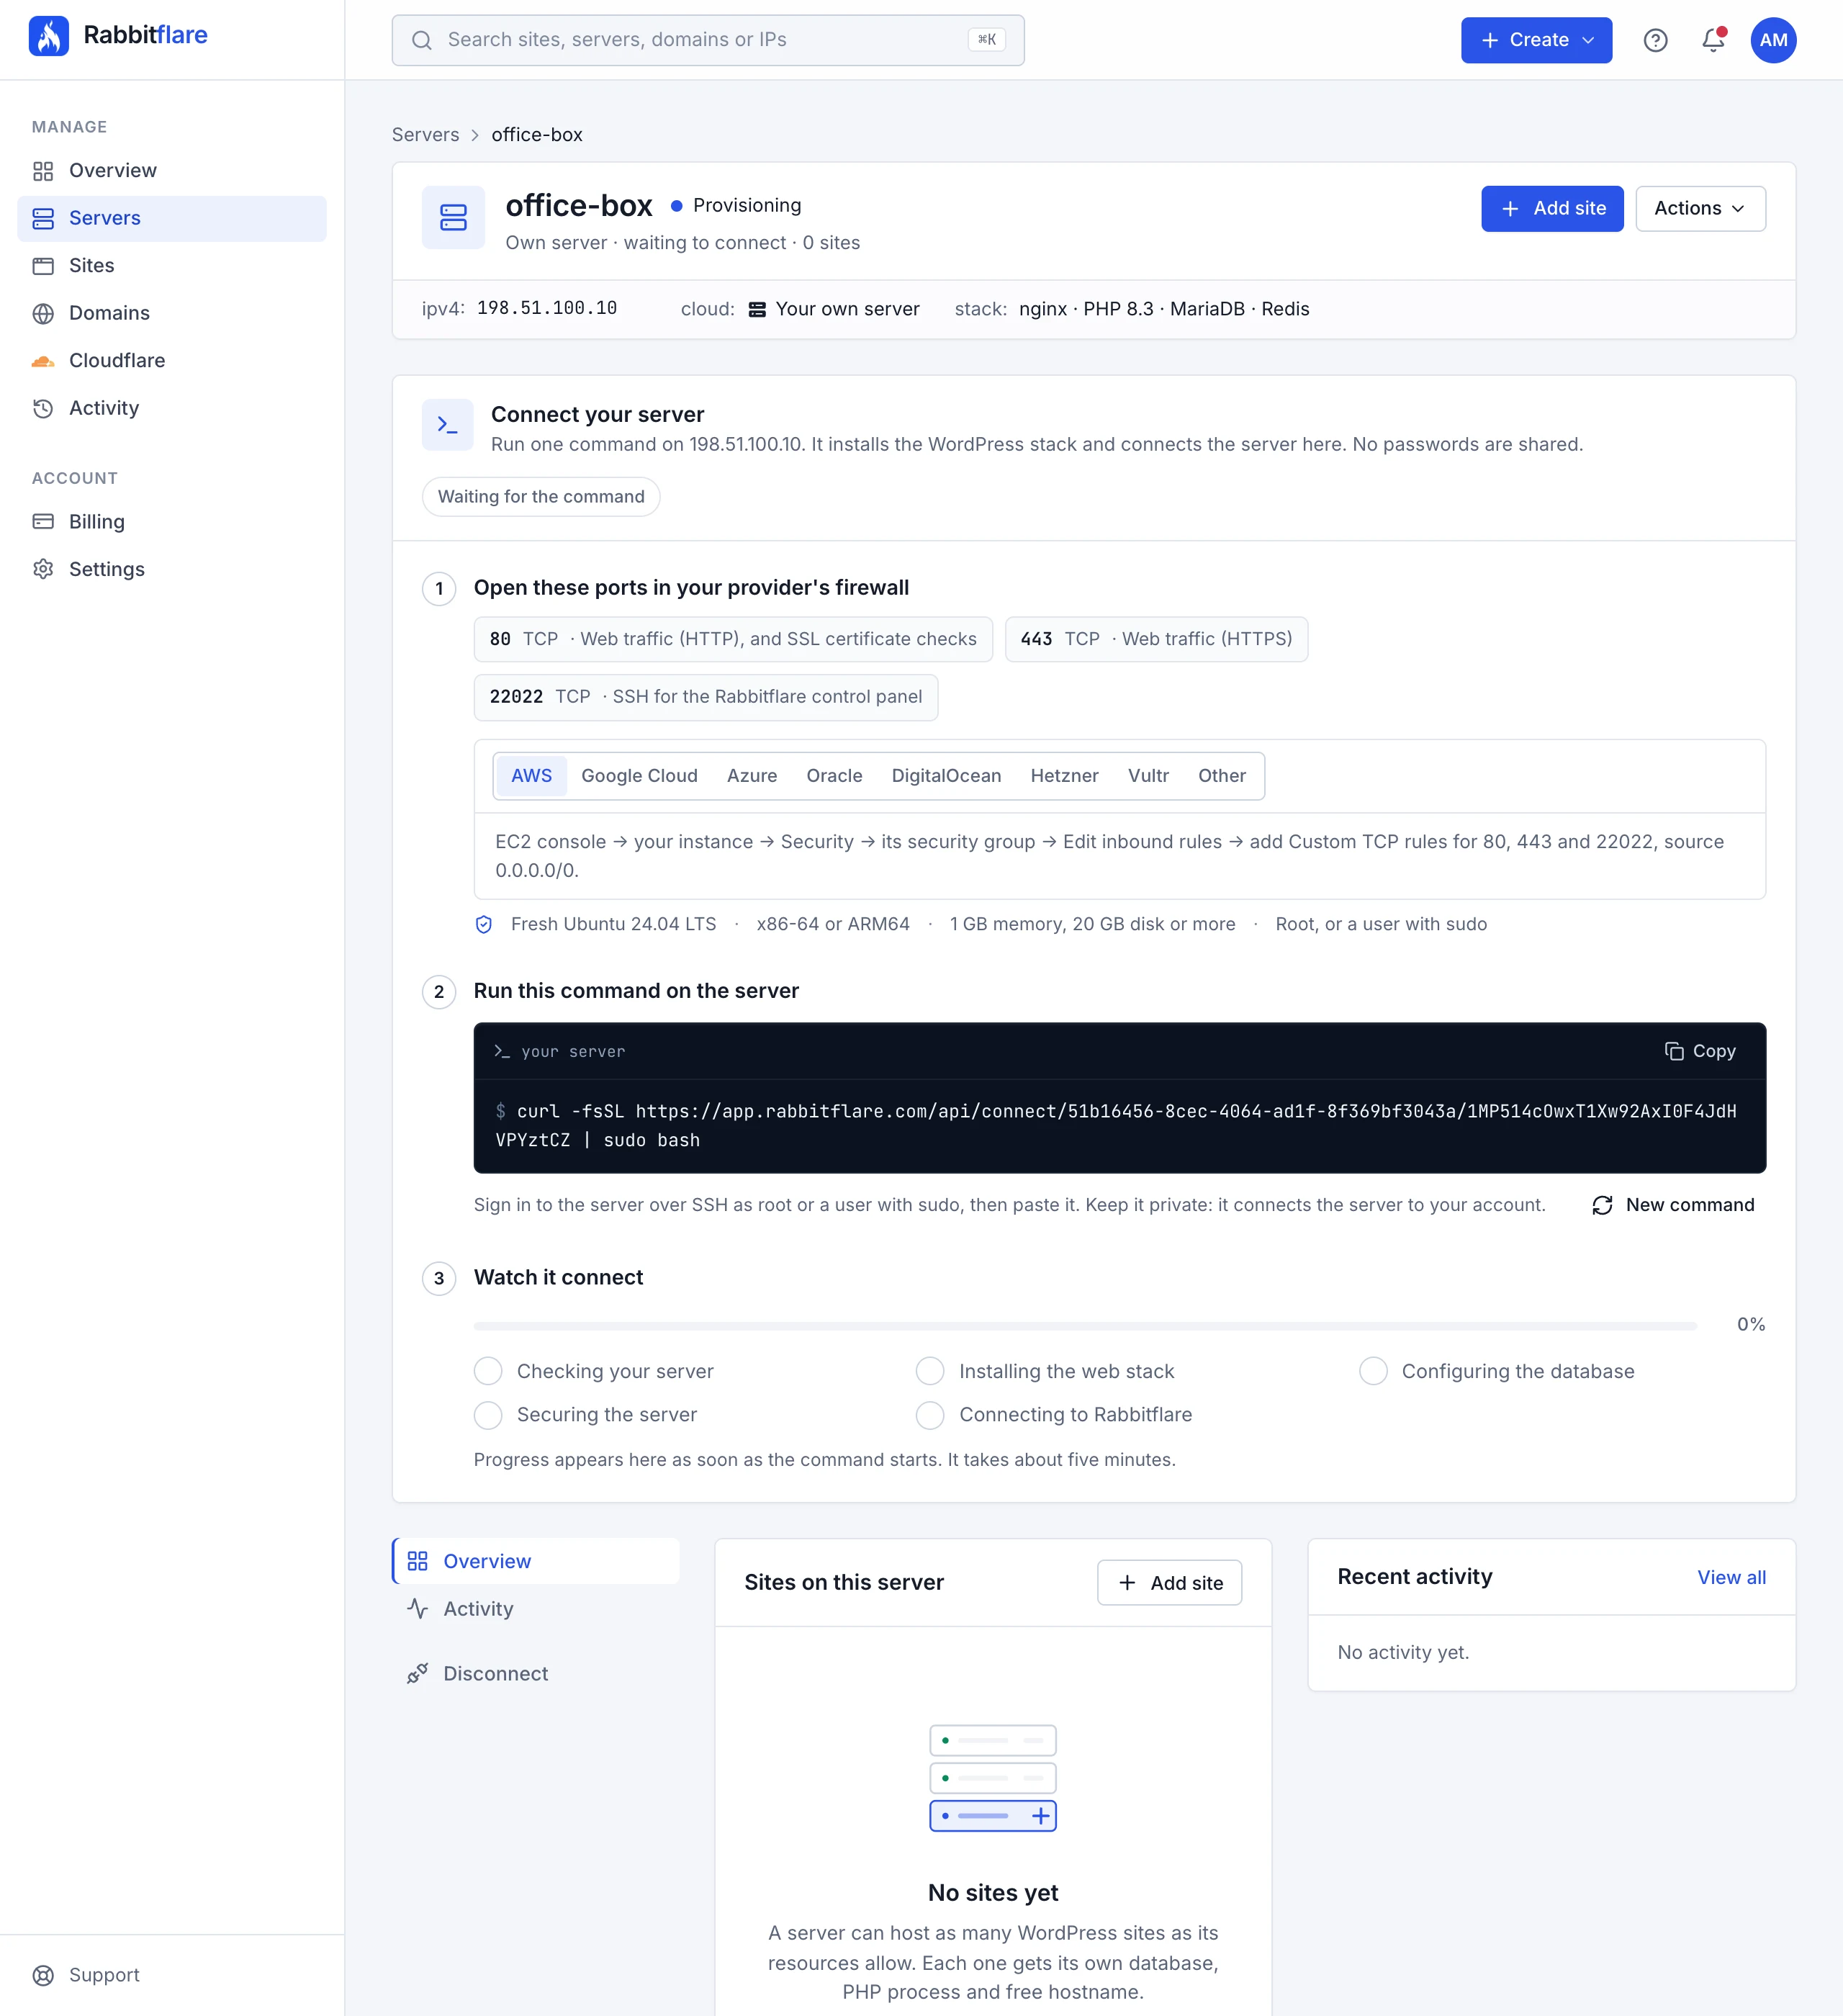
Open the ports
The command opens ports 80, 443 and 22022 on the server itself. If your provider also has a firewall in front of the server, allow incoming TCP on those ports there too. Rabbitflare reaches the server over SSH on port 22022; your visitors use 80 and 443.
| Provider | Where to allow ports 80, 443 and 22022 |
|---|---|
| AWS | EC2 console → your instance → Security → its security group → Edit inbound rules → add Custom TCP rules for 80, 443 and 22022, source 0.0.0.0/0. |
| Google Cloud | VPC network → Firewall → Create firewall rule: direction Ingress, target your VM, source 0.0.0.0/0, TCP ports 80, 443, 22022. |
| Azure | Your VM → Networking → Add inbound port rule: TCP, destination ports 80, 443, 22022, source Any. |
| Oracle | Your instance's subnet → Security list → Add ingress rules: source 0.0.0.0/0, TCP 80, 443 and 22022. |
| DigitalOcean | Only if the droplet has a cloud firewall: Networking → Firewalls → Inbound rules → add HTTP, HTTPS and Custom TCP 22022. |
| Hetzner | Only if the server has a firewall: Firewalls → your firewall → Inbound → add TCP 80, 443 and 22022. |
| Vultr | Only if the server is in a firewall group: Network → Firewall → your group → accept TCP 80, 443 and 22022. |
Elsewhere: if the provider has a firewall in front of the server, allow incoming TCP 80, 443 and 22022. Without one, there's nothing to do.
What's different on your own server
Your sites get everything sites on our servers get, with a few things left to your provider, since the machine is theirs:
- Power, resizing and snapshots are done in your provider's console, not in the panel.
- The free CDN isn't available for sites on your own servers.
- Whole-server backups are your provider's; site backups work as usual.
Disconnecting a server
On the server's Destroy tab, Disconnect server stops Rabbitflare managing it and removes our access key. The server and its sites stay at your provider: sites on your own domains keep working, while their free rabbitflare addresses stop. When you disconnect your last own server, the Own servers plan is cancelled.